
Getting Started: Model Context Protocol (MCP)
Learn the fundamentals of MCP, the open standard for connecting AI assistants to external tools, data sources, and APIs.


© 2026 Dometrain. All rights reserved.
As a developer, you’re likely familiar with using web-based AI chat interfaces to write snippets of code. After describing the problem, the chatbot responds with a snippet of code you can copy and use. AI agents take this a step further by running on your local machine. These autonomous agents have full context of your codebase, can read and write files, and execute commands directly on your machine.
Codex is one such tool from OpenAI. It operates inside a local directory and accesses your codebase directly. With the right context, it can fix bugs and implement complete features in your codebase with little to no human interaction. You simply review the code it generates and either ask it to rework pieces of it or accept it.
In this article, you’ll learn more about Codex and how its different surfaces work. You’ll then install the Codex CLI tool and run it in a real code repository. Finally, the article will outline some best practices for working with Codex.
Codex is OpenAI’s coding agent for software development. Unlike a chat interface that responds to questions, Codex is designed to complete tasks: it can inspect files, run commands, and edit code, either locally on your machine or inside a managed cloud environment. Rather than suggesting changes for you to copy into your editor, it acts directly on your codebase.
Codex is available across four main surfaces. The CLI is the terminal-first option and runs locally on your machine in whichever directory you launch it from. IDE integrations bring Codex into editors like VS Code for a more embedded, editor-centric experience. Codex Cloud runs tasks in managed remote environments and is better suited to longer-running work you want to delegate and check on later. Finally, the recently launched Codex App lets you control local and remote coding agents through a Desktop GUI.
The main factor in choosing a surface is where you want the agent to run and how closely you want to follow its progress. If you want to monitor changes as they’re made, the CLI or an IDE integration keeps the work on your machine and in front of you. If you’d rather delegate a longer session and review everything at the end, Codex Cloud runs the task in a managed remote environment. The Codex App spans both, letting you manage local and remote sessions from a single interface.
Using the CLI is the easiest way to get started with AI agents. You can see exactly where Codex is running, which directory it’s using, and how it applies changes. That visibility makes it easier to catch mistakes early and understand what to focus on as you move into more autonomous workflows. The rest of this article focuses on the CLI.
To follow along, you’ll need a machine running Windows, macOS, or Linux with either Homebrew or Node.js (LTS) installed. The install section covers both paths.
You’ll also need an OpenAI account. Codex can be used by signing in with an eligible ChatGPT plan or by using API credits loaded in the OpenAI Platform. Codex support across ChatGPT plans can change over time, so it’s worth checking OpenAI’s latest plan details if you’re unsure. The next section walks through both authentication methods.
The article demonstrates Codex on a real codebase, so have a repository available to test with. For illustration, it references .NET’s eShop repository, but any codebase you’re familiar with will work. Some comfort with the terminal and a basic understanding of Git will also help you follow along.
Install Codex CLI using one of the commands below:
Node.js (Windows, macOS, and Linux)
npm install -g @openai/codex
Homebrew (MacOS and Linux)
brew install --cask codex
Once installed, start Codex CLI with the following command:
codex
You’ll be prompted to sign in with either your ChatGPT account or an API key.
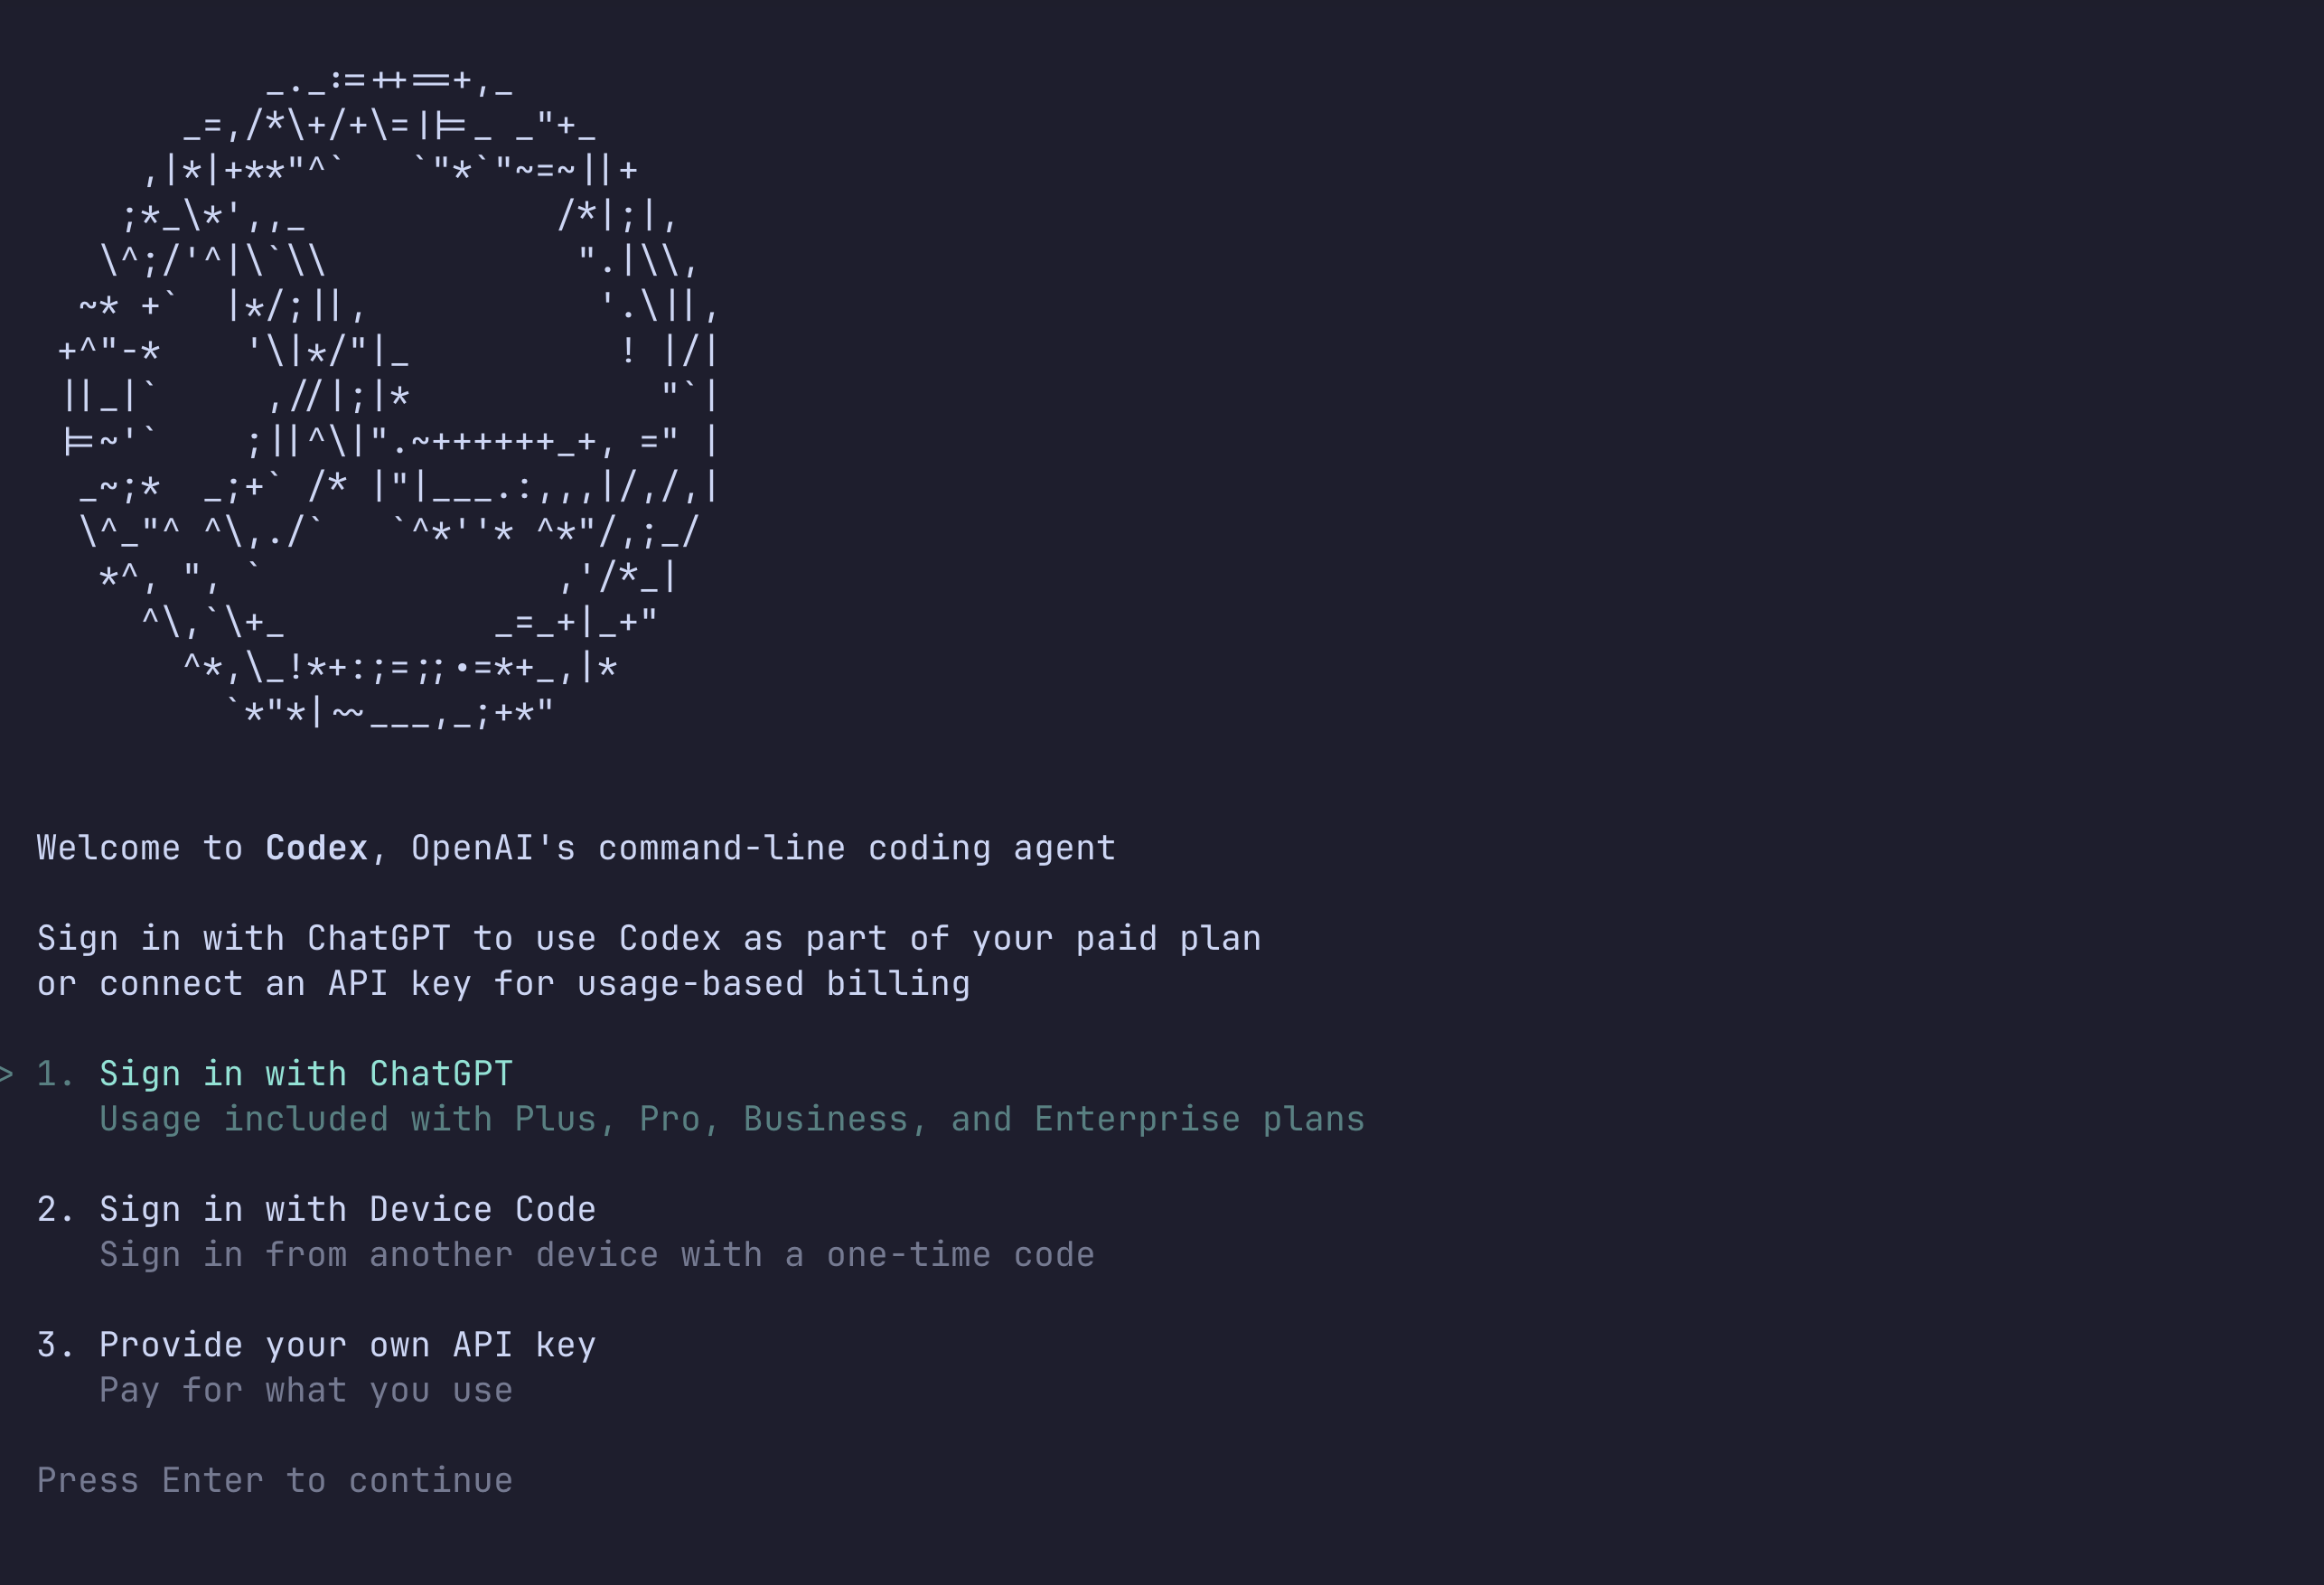
If your ChatGPT plan includes Codex access, you can sign in with that account and use your plan’s included usage limits.
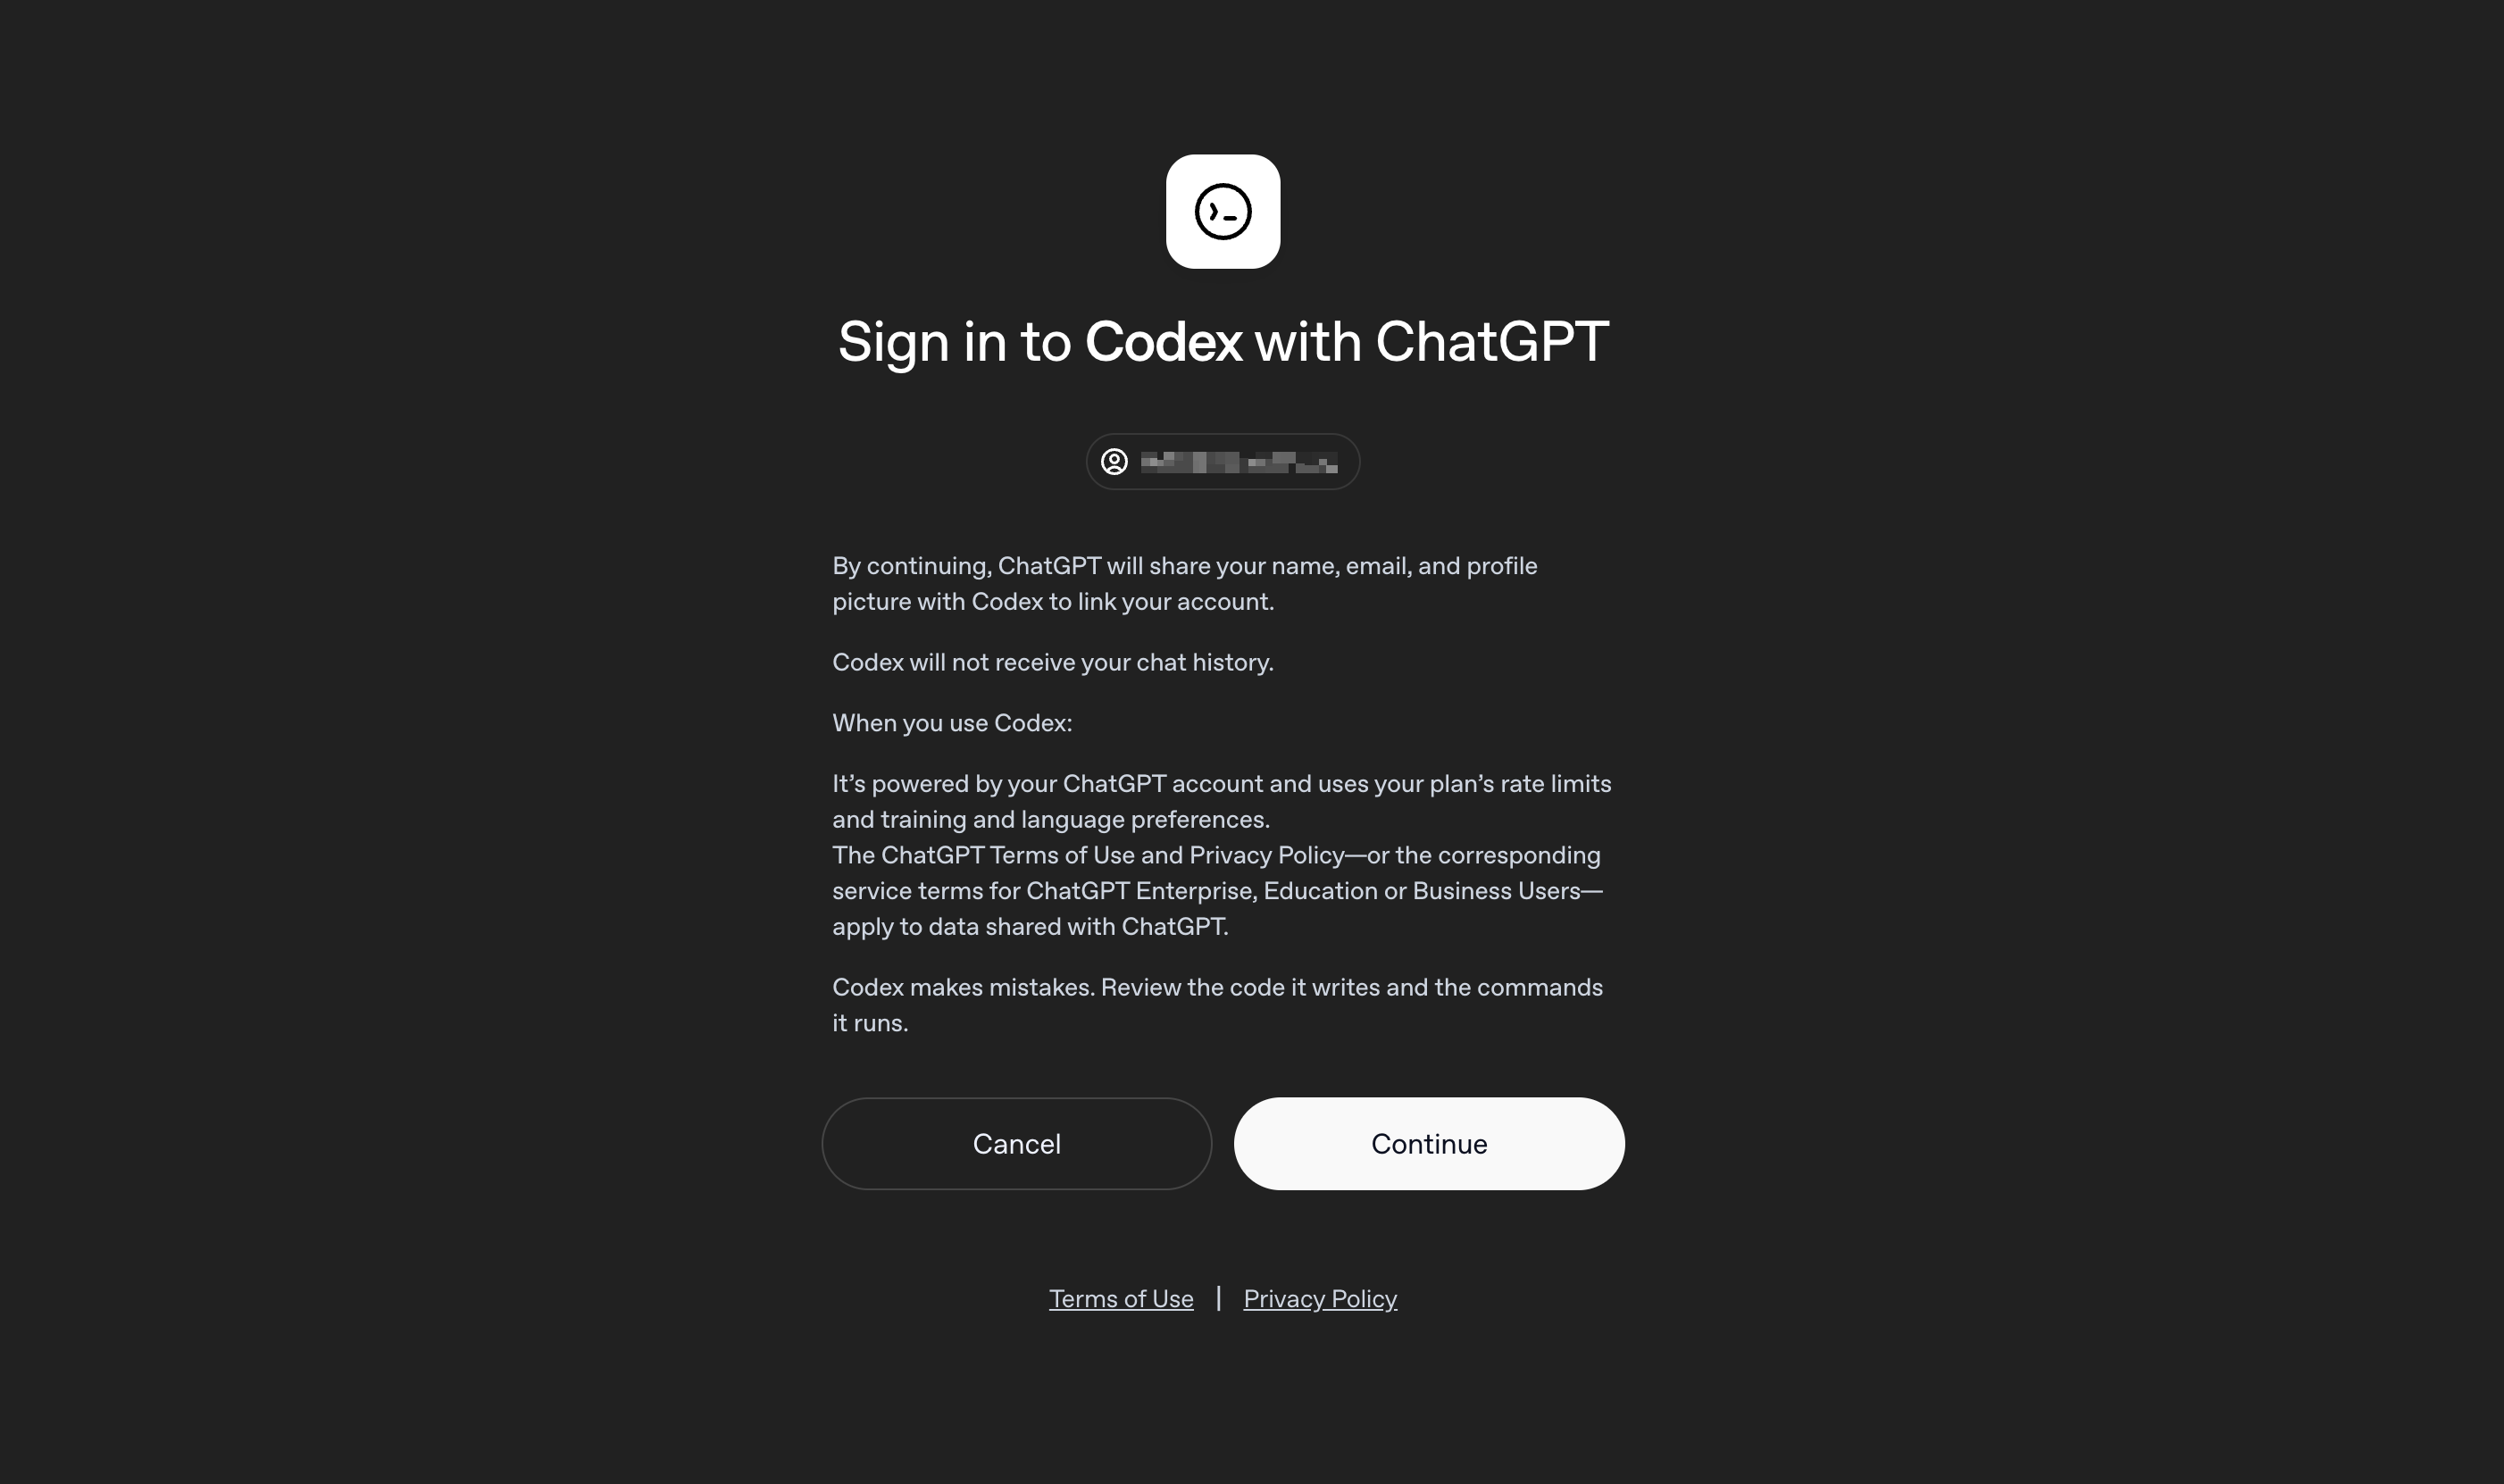
On the auth screen that appears when running Codex CLI for the first time, select 1. Sign in with ChatGPT. Your browser should open automatically and ask you to log in to your ChatGPT account and authorize the Codex app:
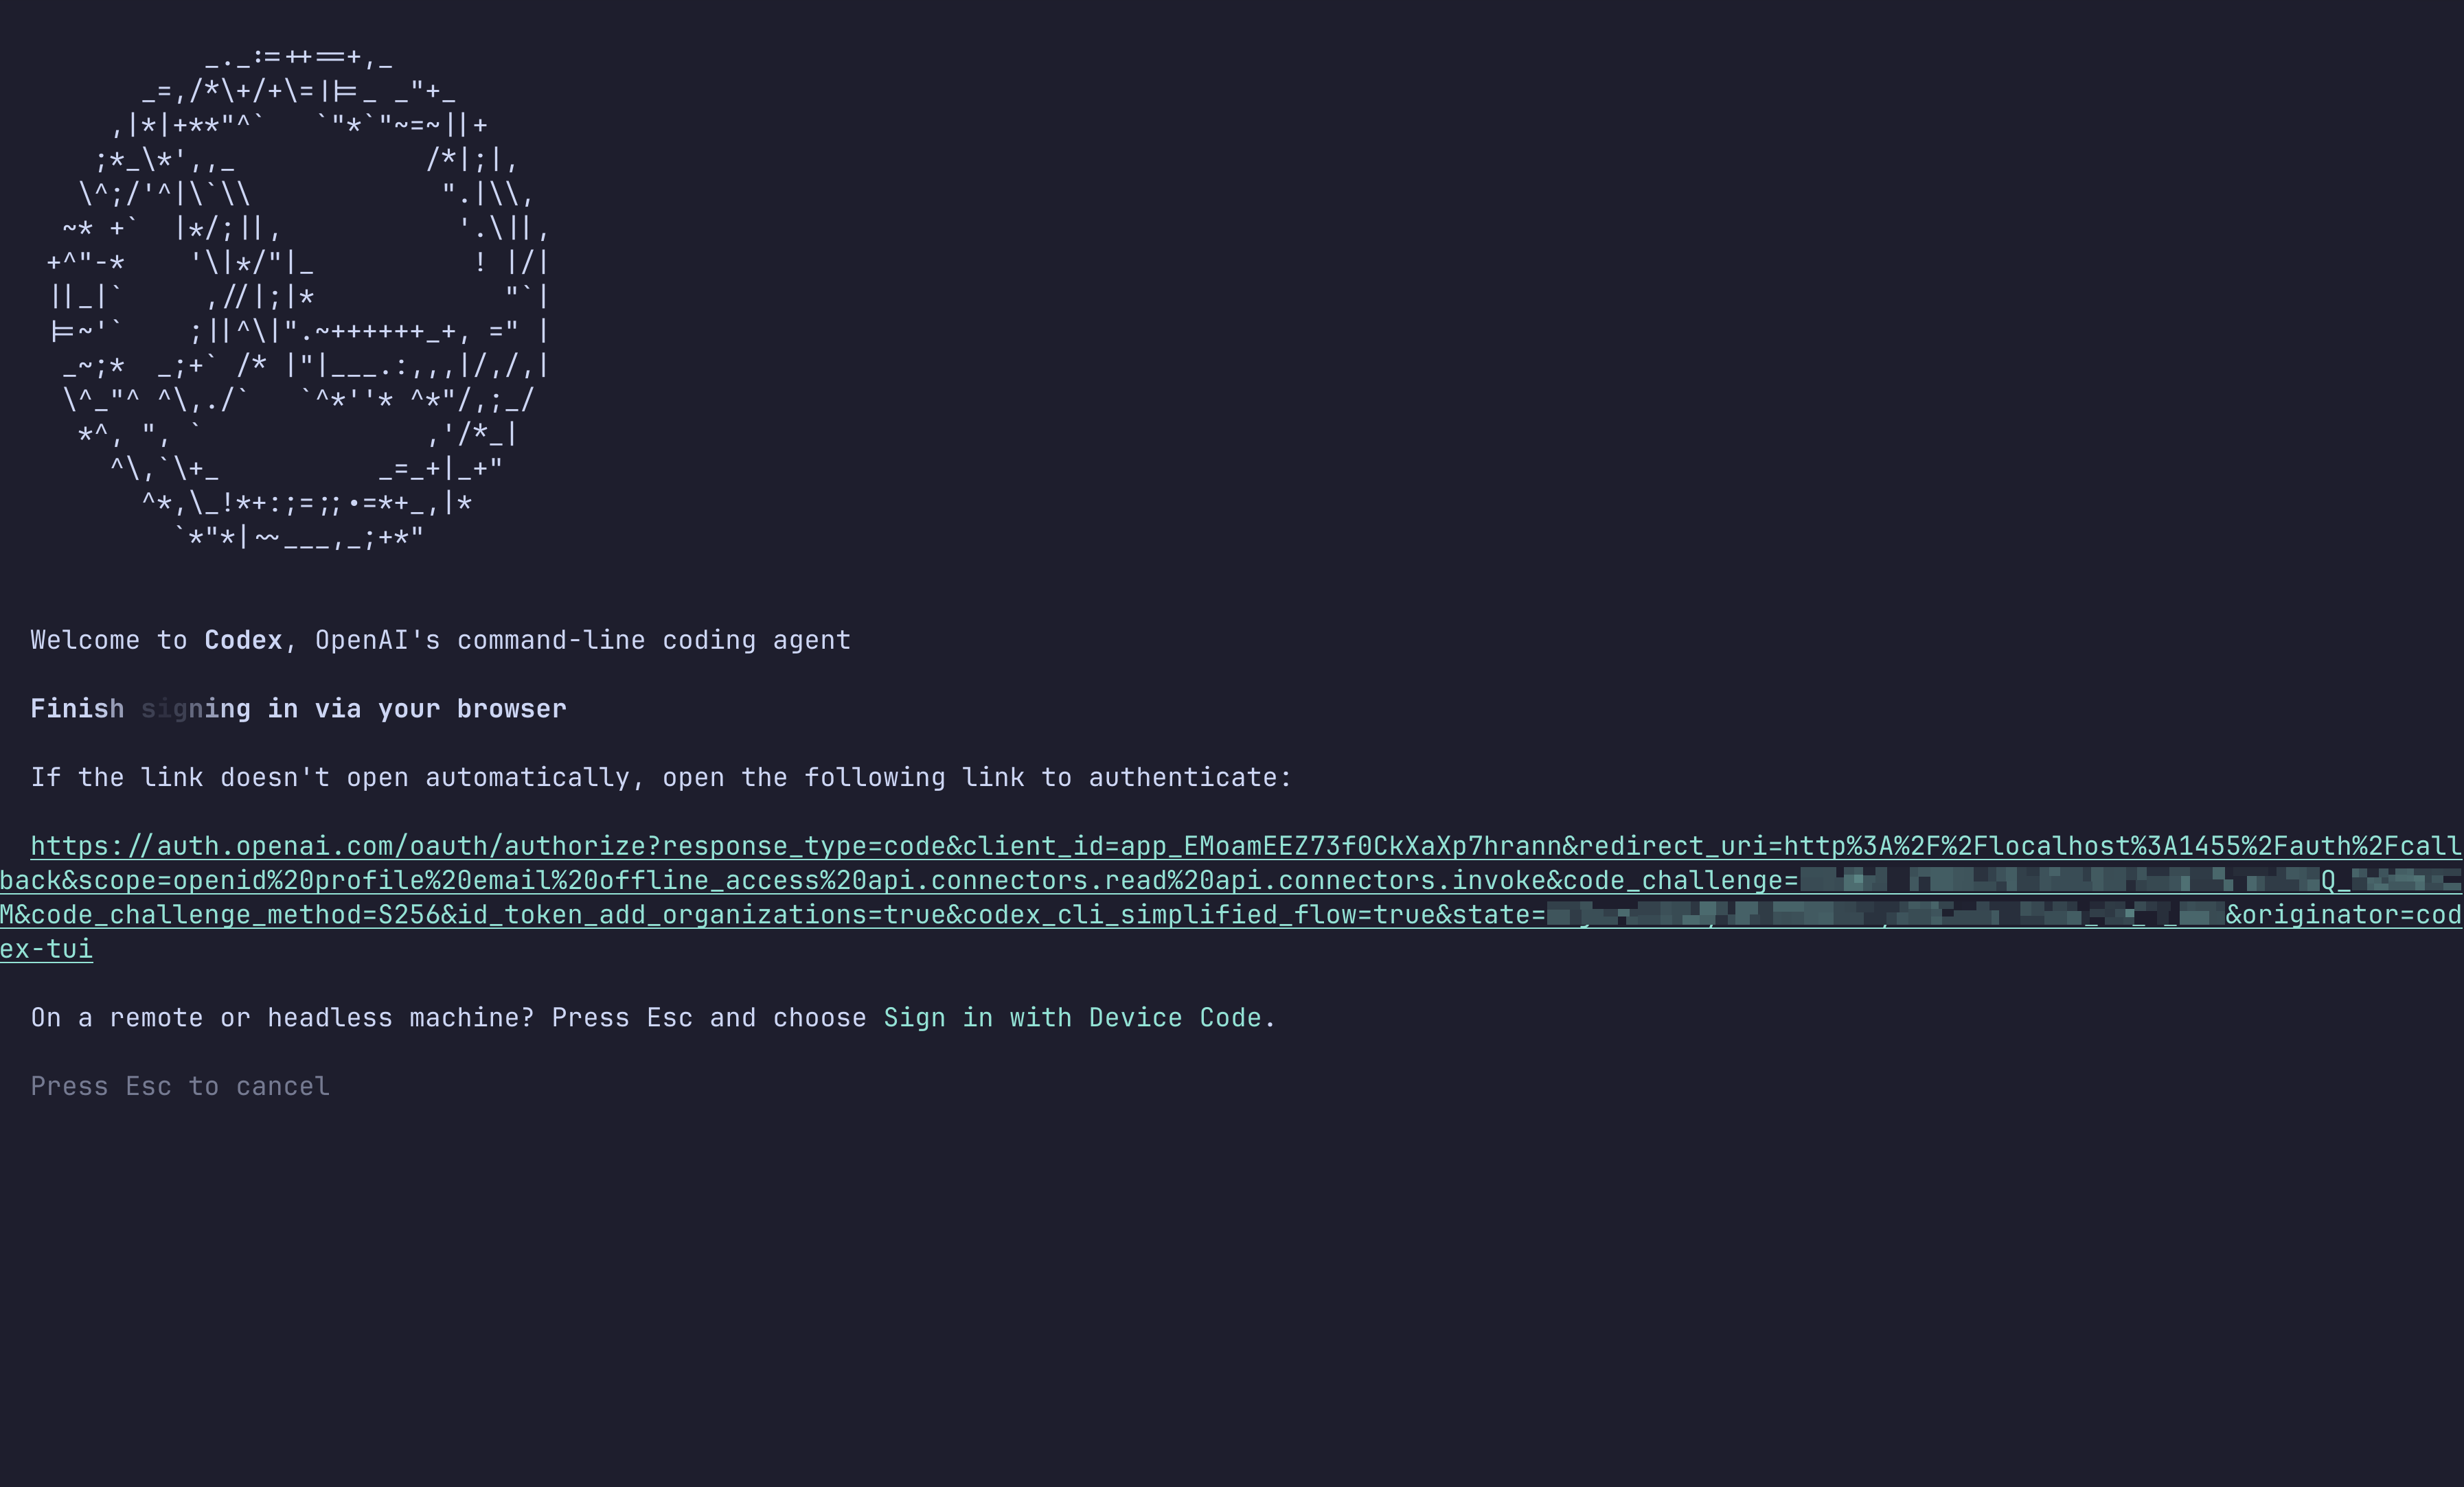
If the webpage doesn’t open automatically, copy or click on the link that appears in the terminal:
Finish signing in by clicking Continue. You’ll see a success screen indicating you can close the webpage and return to Codex CLI.
Before you start prompting, Codex CLI displays a short list of usage reminders worth reading through.
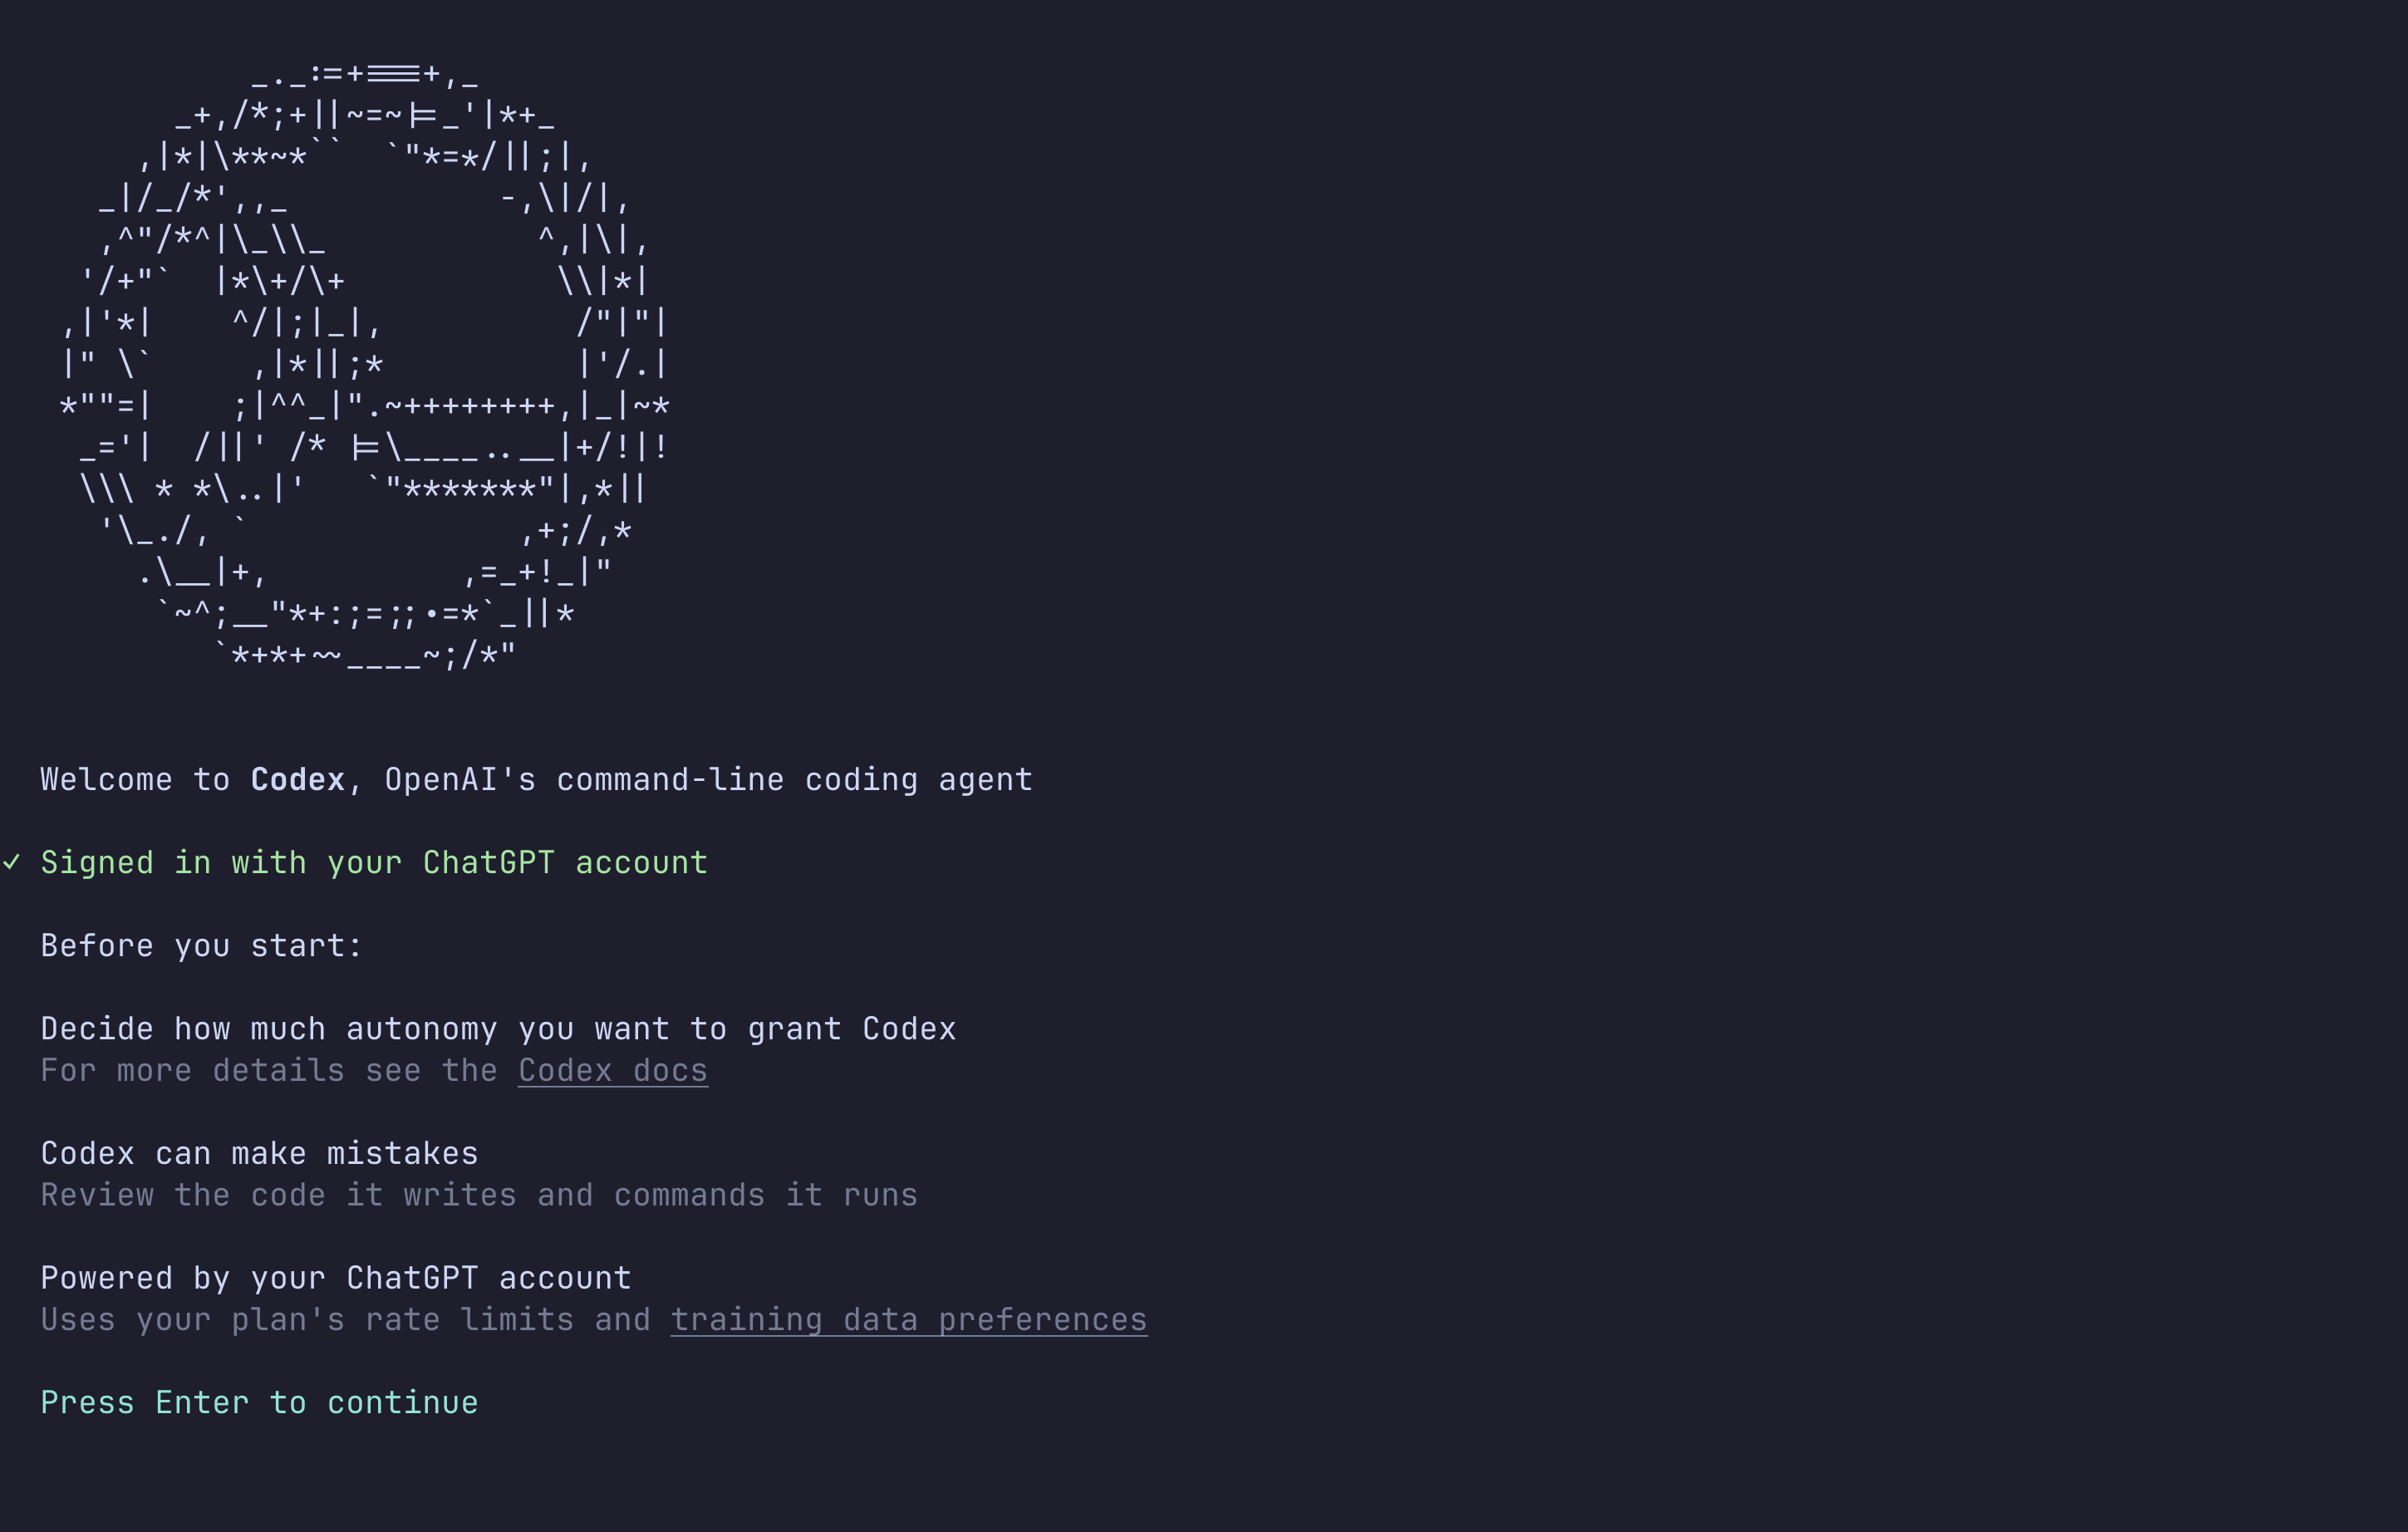
After pressing Enter, you’re ready to start using your new AI agent.
If you prefer usage-based billing, or if your ChatGPT plan does not include Codex access, you can authenticate with an API key instead and pay for what you use.
Log in to the OpenAI Platform and then navigate to the API Keys page. On the top-right of the dashboard, click on Create new secret key, fill in the details for your new API Key, and then click Create secret key:
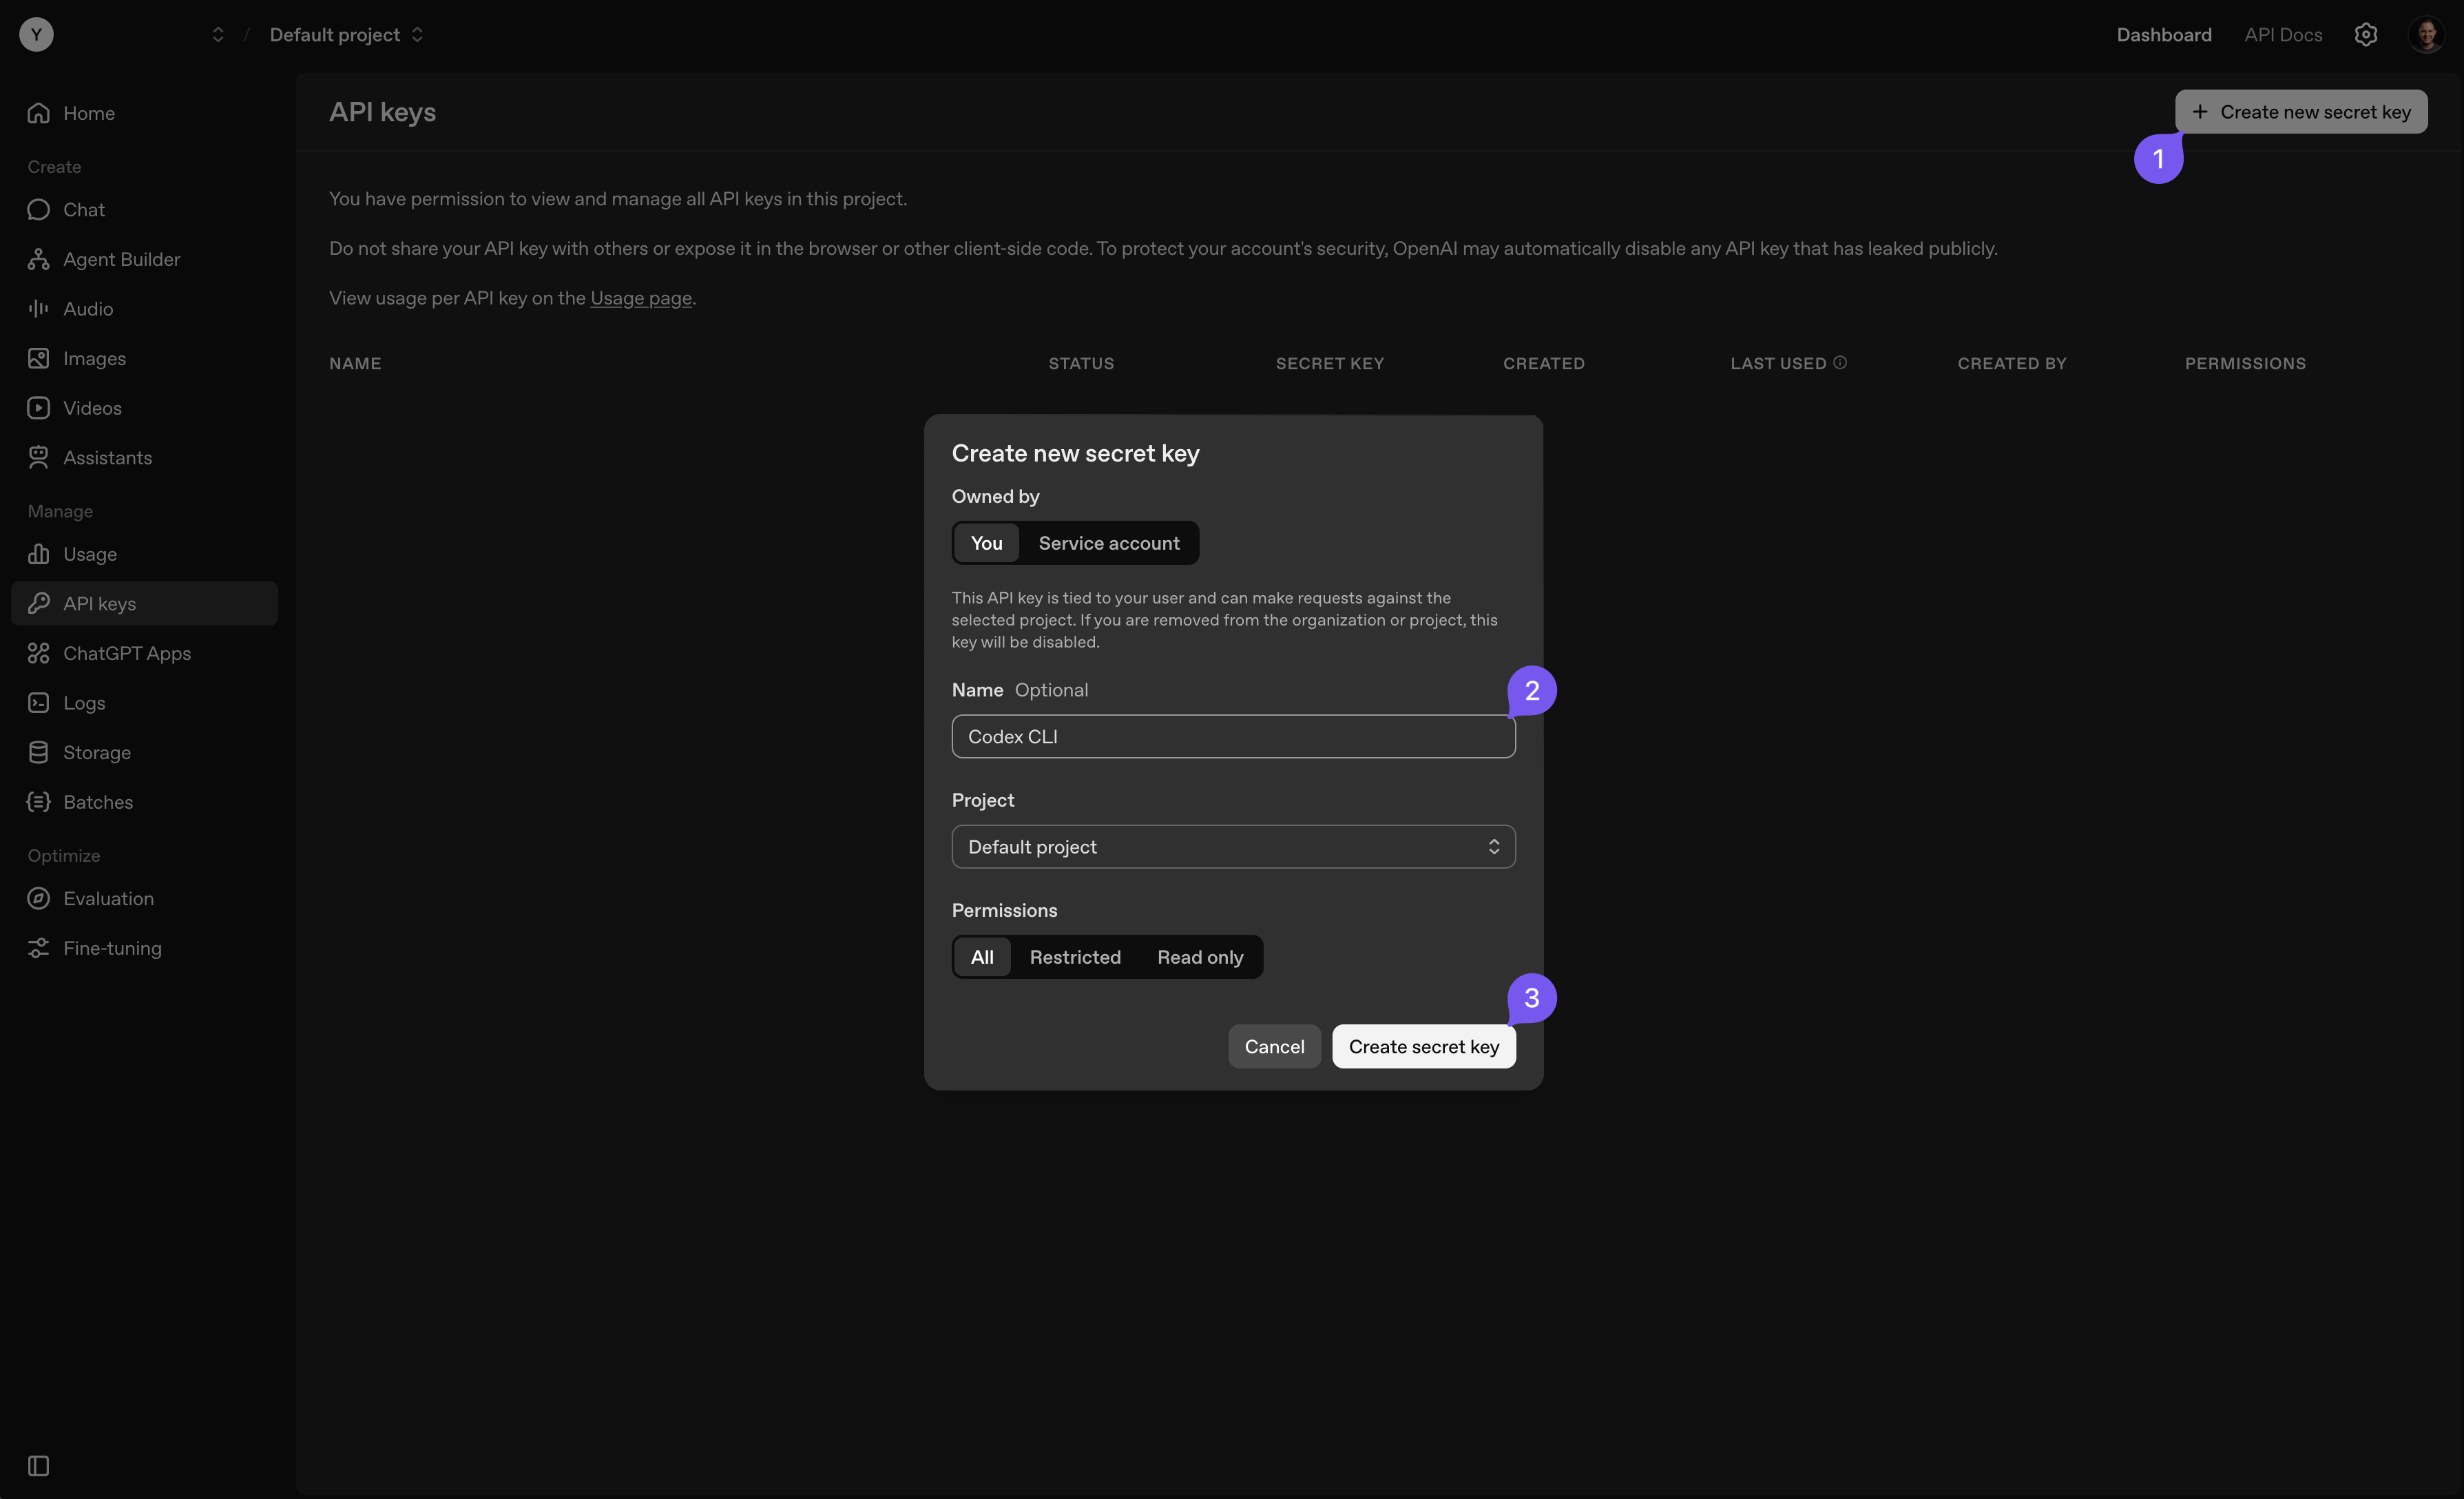
Copy the API Key that appears on the next screen.
Back on the initial Codex CLI auth screen, select 3. Provide your own API key. Enter the API Key you copied in the previous step.
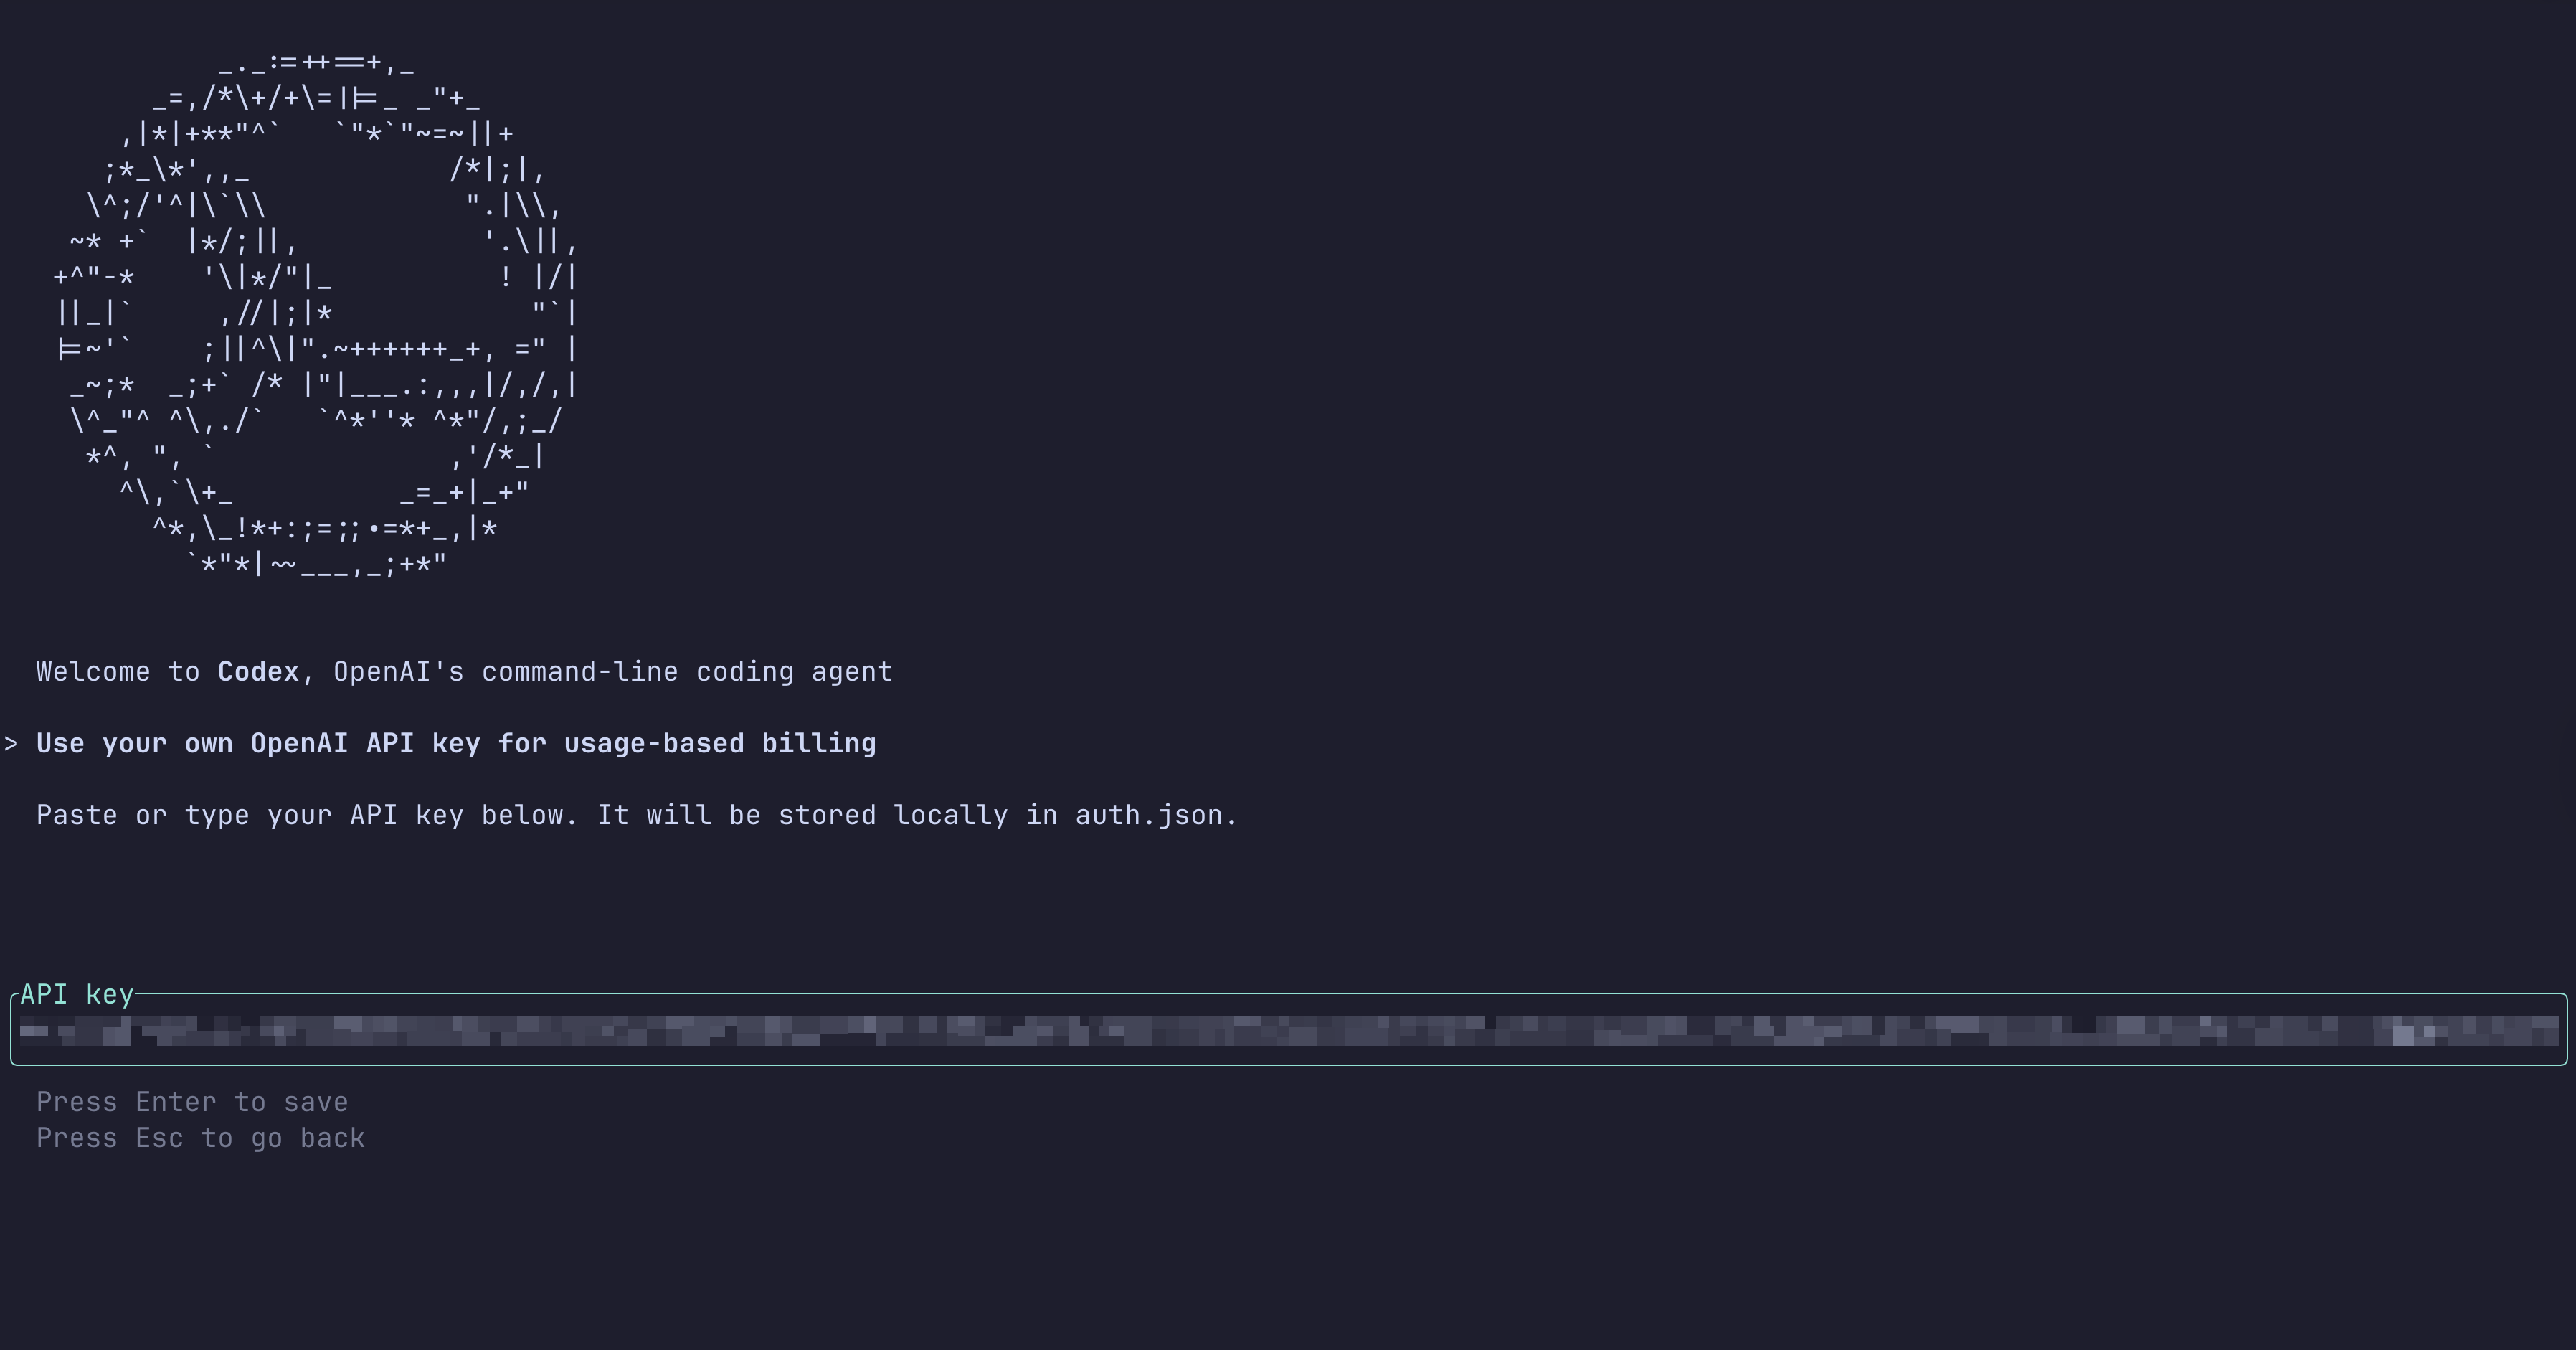
Press Enter to finish the setup.
In your terminal, navigate to your project’s source code directory and start Codex CLI:
codex
Because Codex runs autonomously and might execute commands or read any files in the current directory, it’ll ask you to confirm if you trust the folder you’re opening:
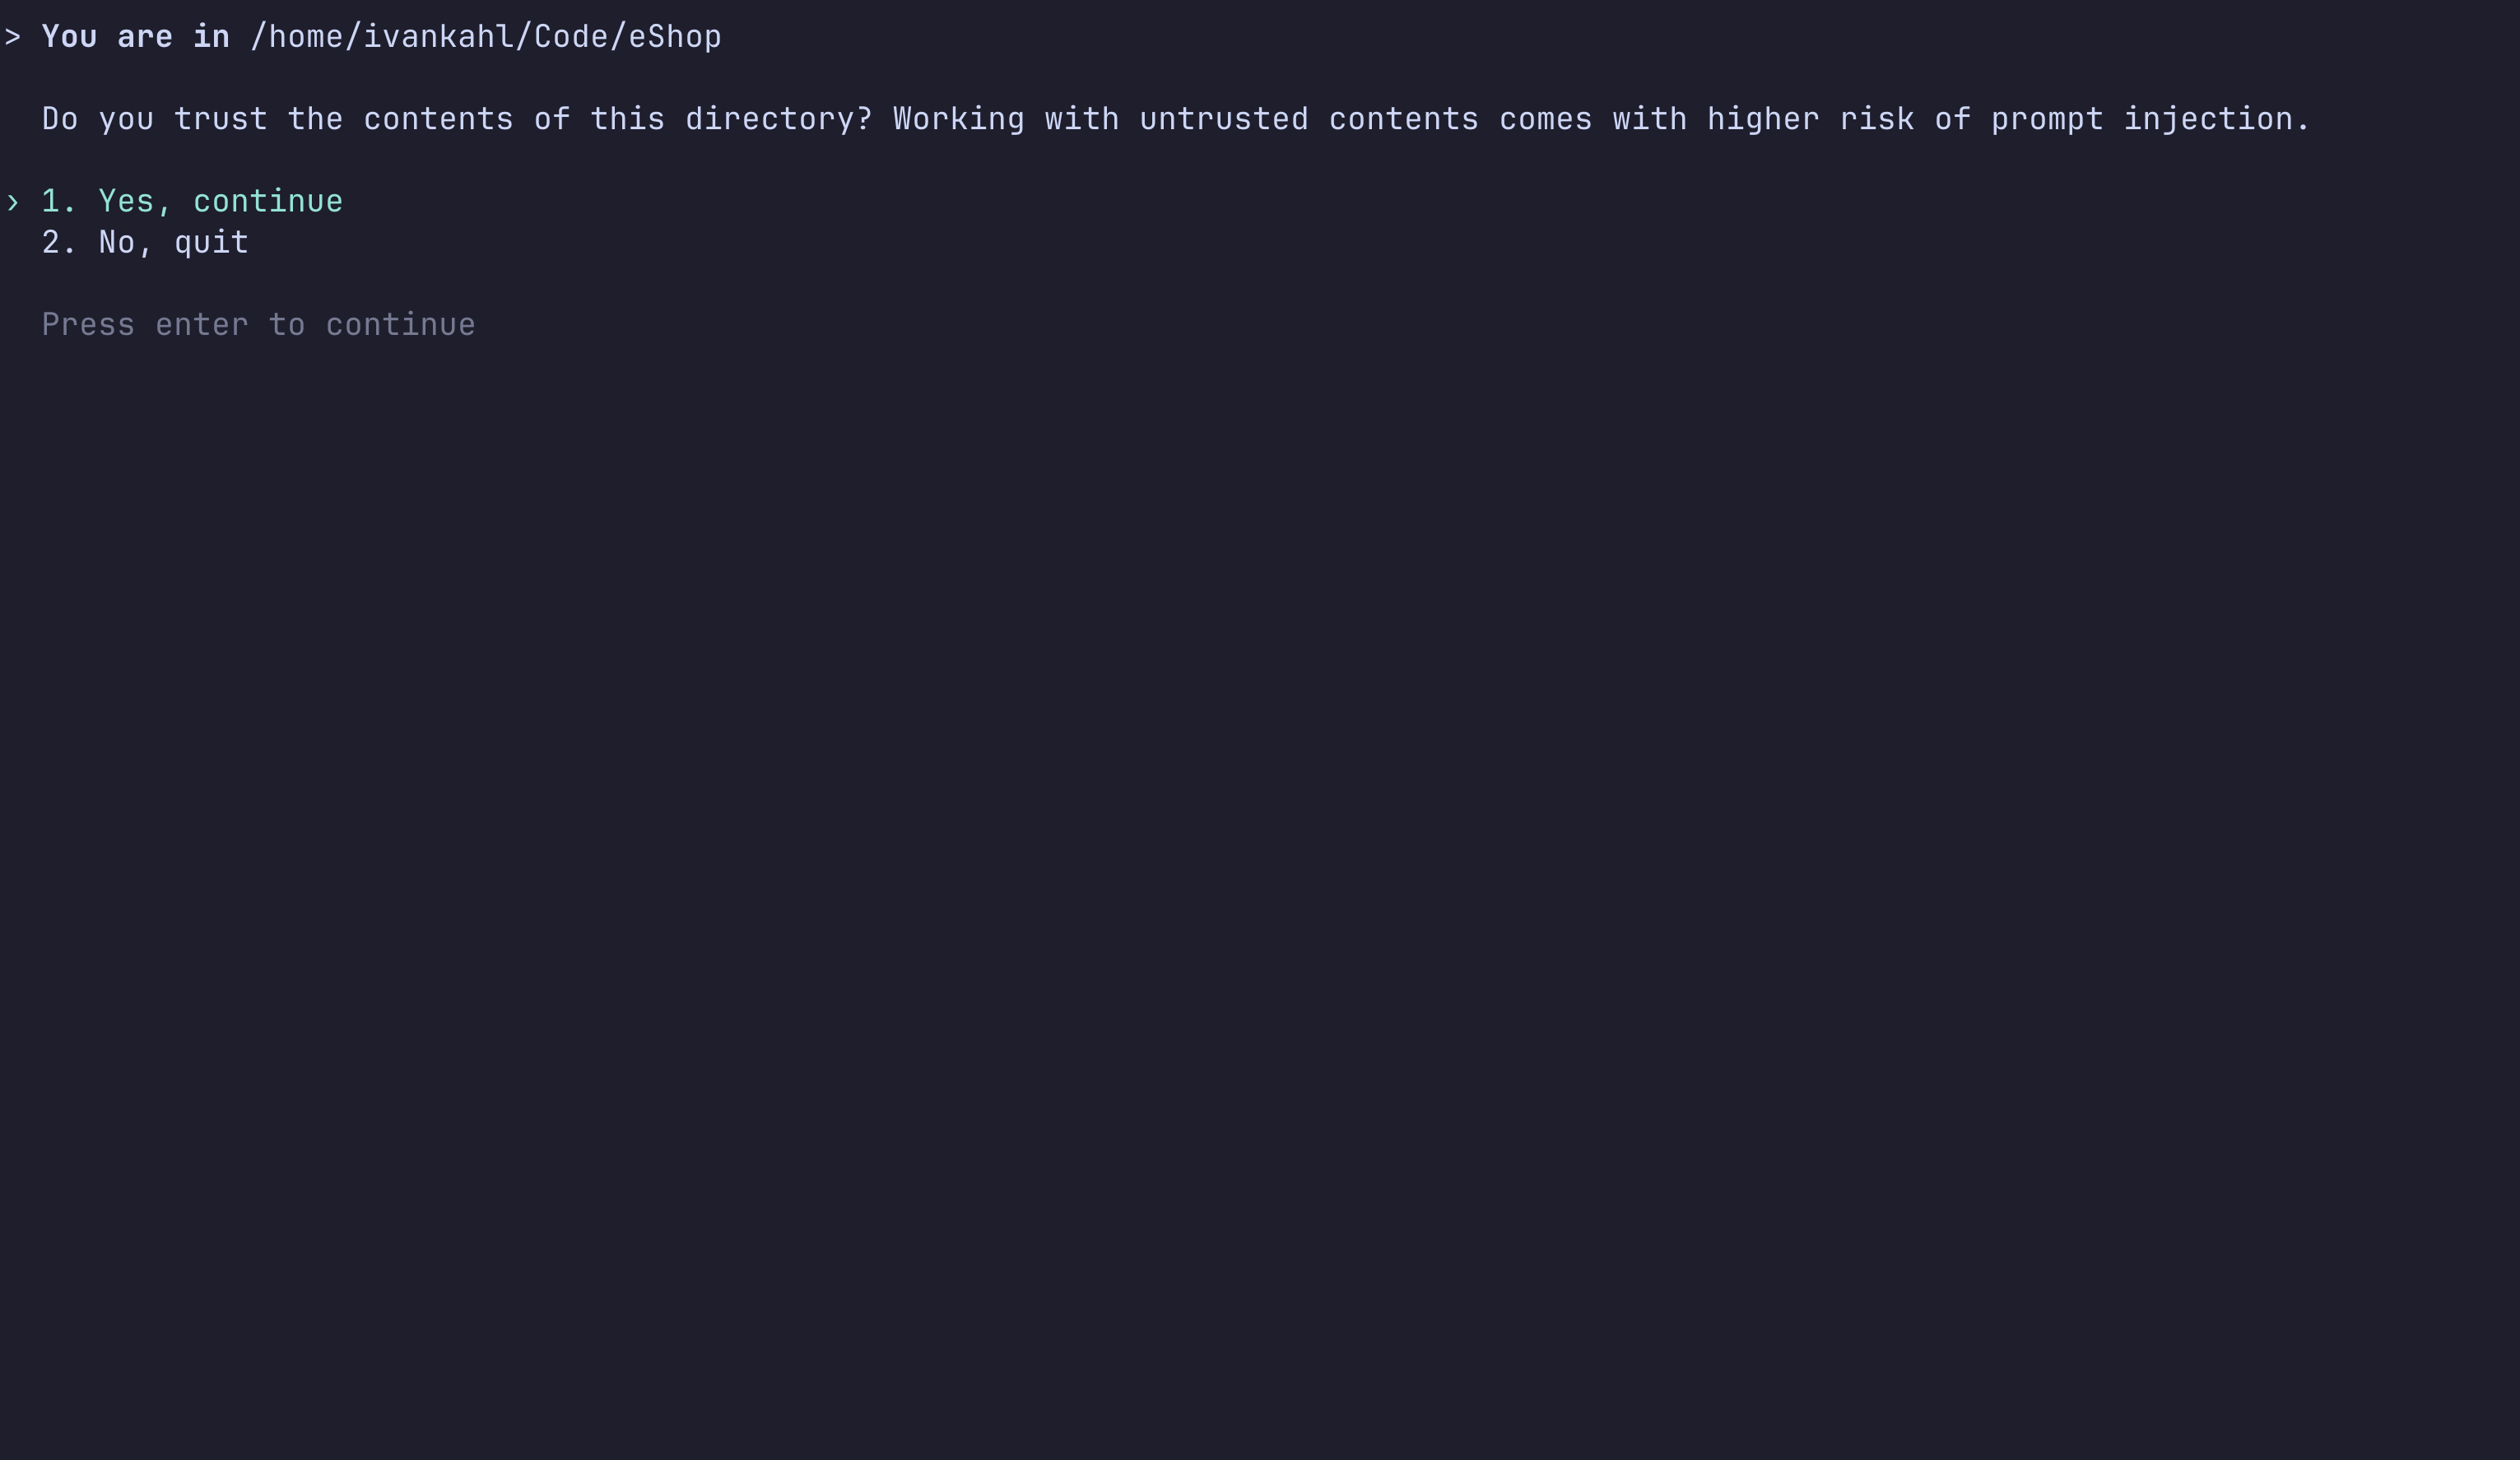
Select 1. Yes, continue to proceed.
Codex needs context about your project to produce useful output. Without it, the agent has no way to know which patterns, commands, or constraints apply to your codebase, and the results will reflect that.
An AGENTS.md file is designed to give supported AI agents context for a project by providing a high-level overview. Codex supports this file and can even help you scaffold the file.
Run the following command in Codex CLI:
/init
Codex will start an agent that scans the directory and Git history to determine which languages and frameworks are used, as well as the high-level directories. Once it’s finished, you’ll find a short AGENTS.md file present in your project directory.
Below is an example of the AGENTS.md file that Codex scaffolded for the eShop repository.
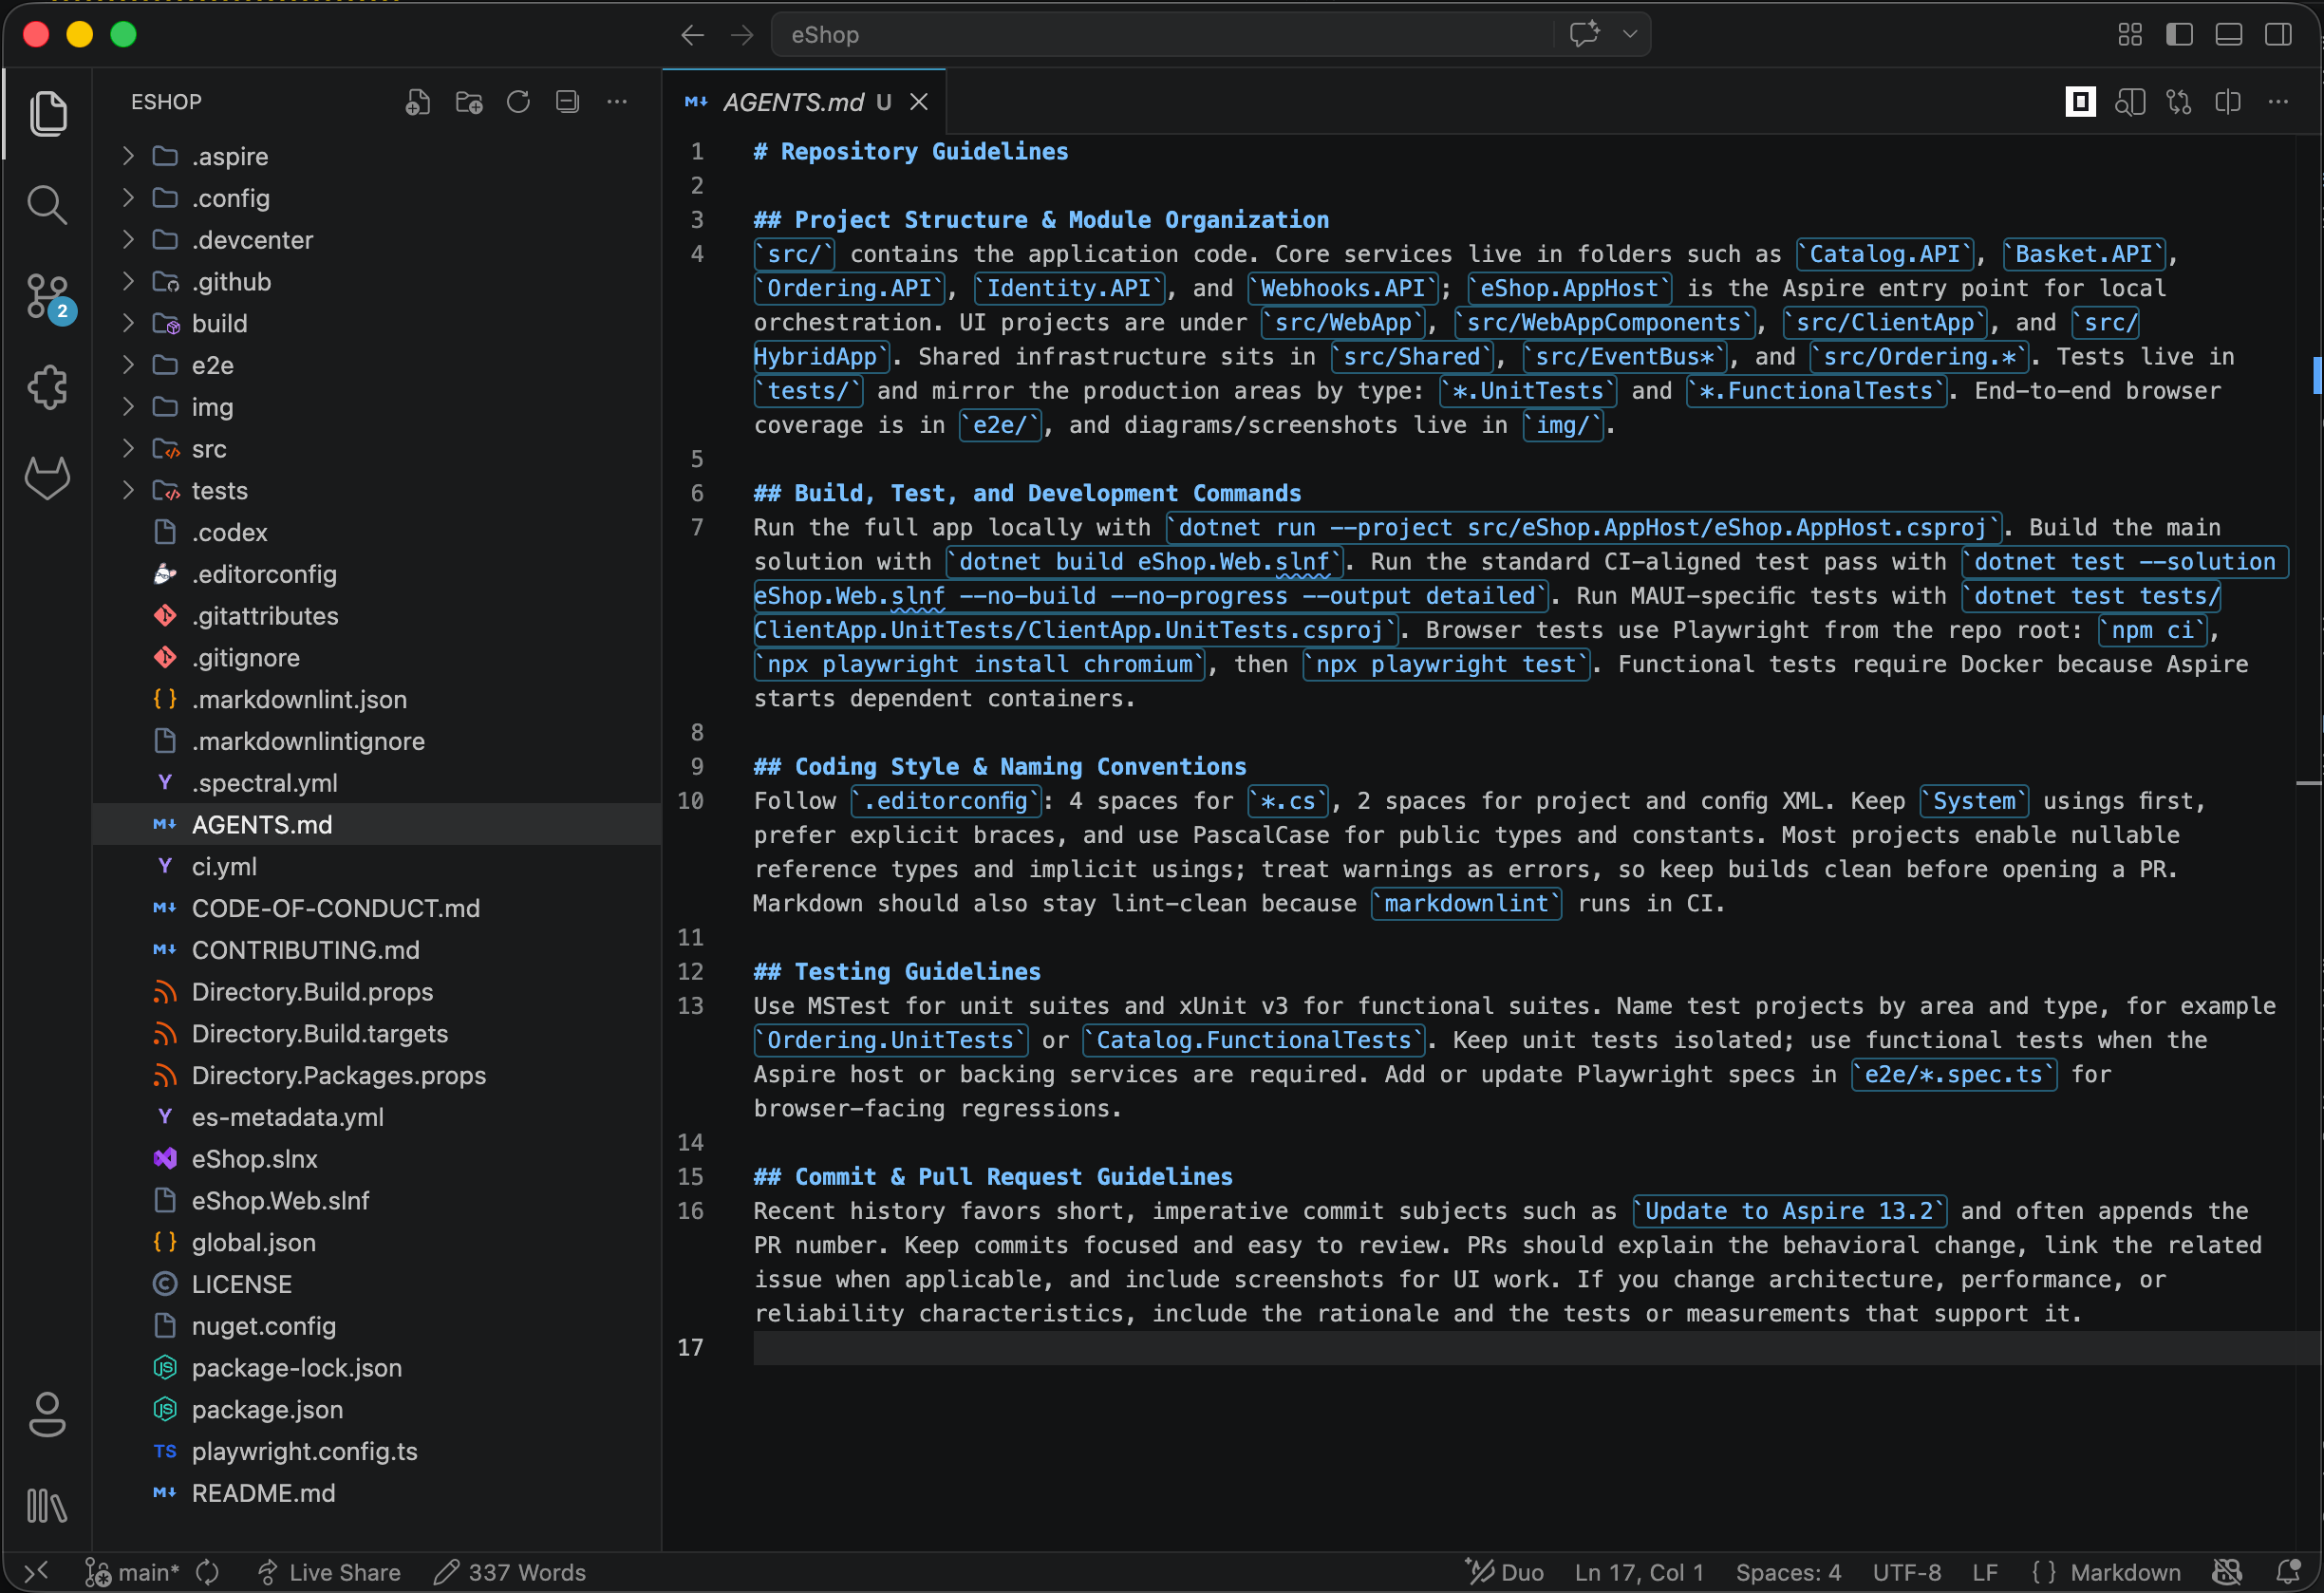
It includes project structure, build and test commands, coding standards, testing guidelines, and Git guidelines. As you use your agent, update this file with any other useful information that’ll help the agent complete tasks more quickly and accurately.
These details will automatically be included in future prompts to Codex, giving it a consistent starting point for every task.
Because Codex can autonomously read files throughout your codebase, it’s great at explaining complex parts of a codebase. For example, you can ask Codex to explain how orders work in the eShop application:
Please can you explain how Orders work in the eShop application? I want to know when and how they’re created, and what workflow they follow.
After submitting the prompt, Codex scans the source code for all references to orders and outputs the following high-level explanation:
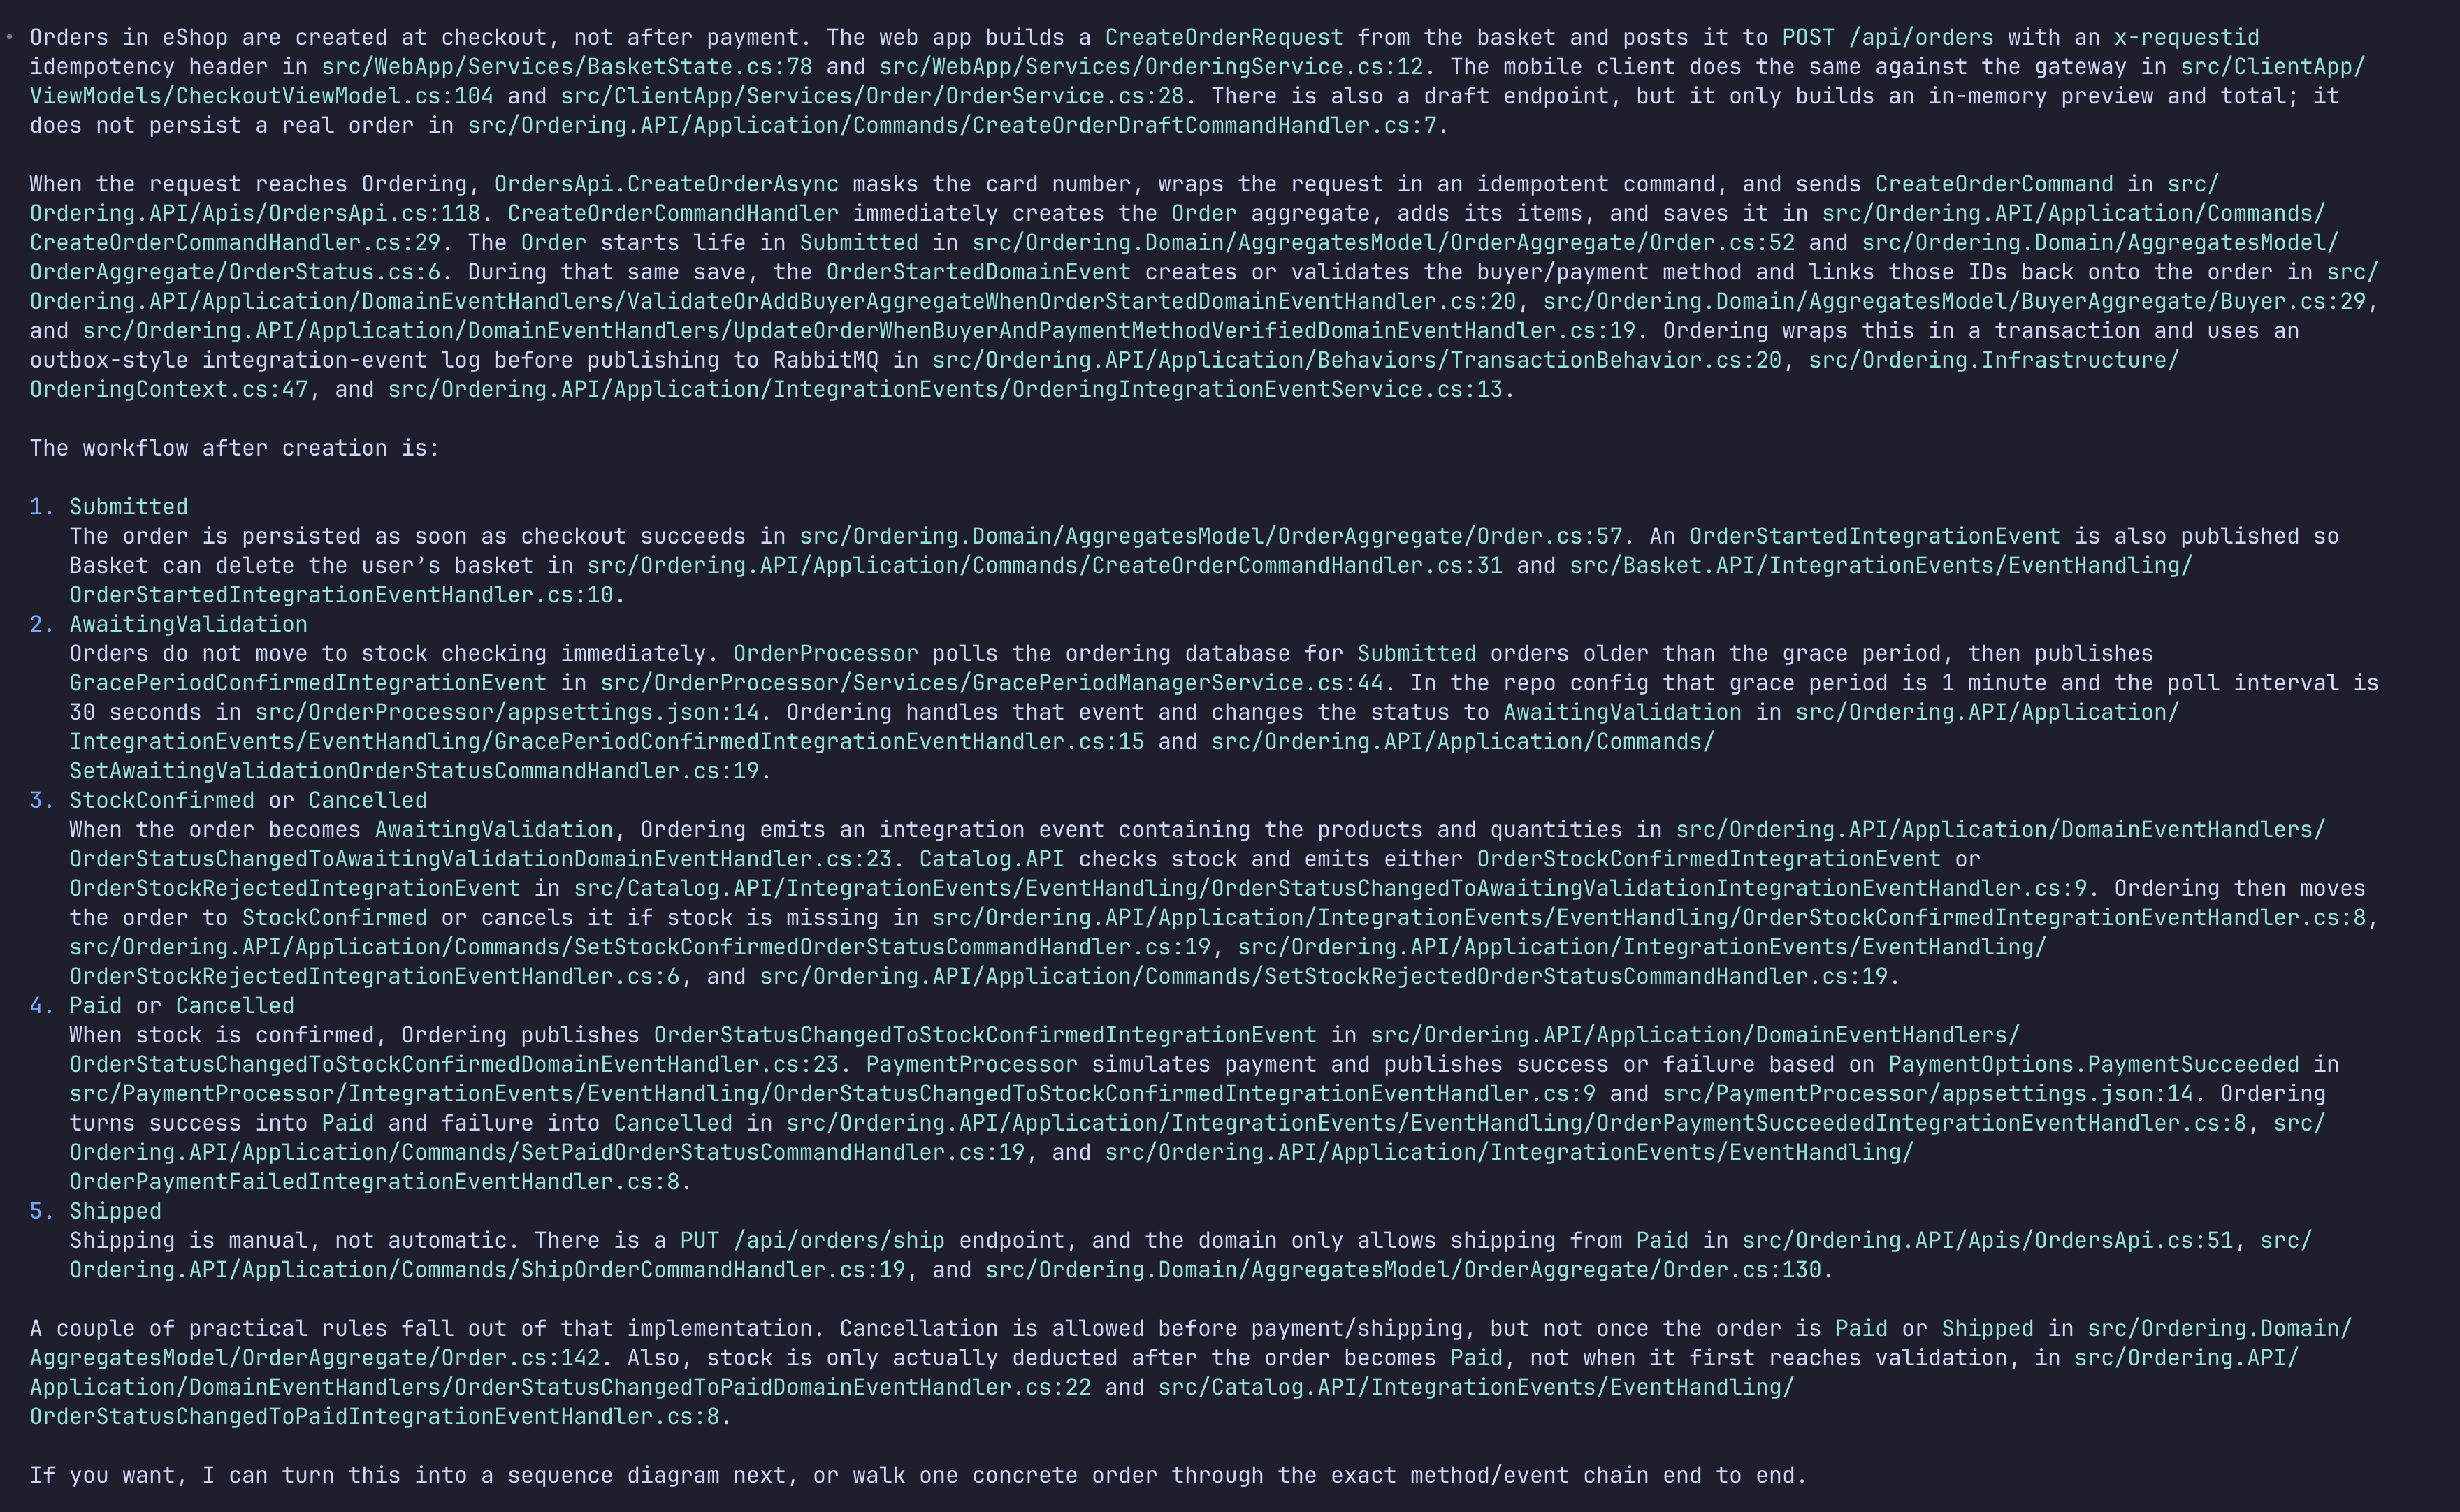
You can even ask it to generate Mermaid diagrams or example walkthroughs of the code. Very useful when writing documentation!
Until now, all the examples have involved reading source code and documenting it. However, Codex is especially useful when making code changes, such as implementing a new feature or fixing a bug.
You can instruct Codex to improve the card number validation when creating a new order:
Add stronger credit card number validation to the ordering flow. Update the src/Ordering.API/Application/Validations/CreateOrderCommandValidator.cs file so card numbers must contain only digits after removing spaces/dashes, must be 12-19 digits long, and must pass a Luhn check. Keep the change minimal and consistent with the existing code style.
After submitting the prompt and waiting a couple of seconds, Codex responds with the following changes, ready to review directly in the terminal:
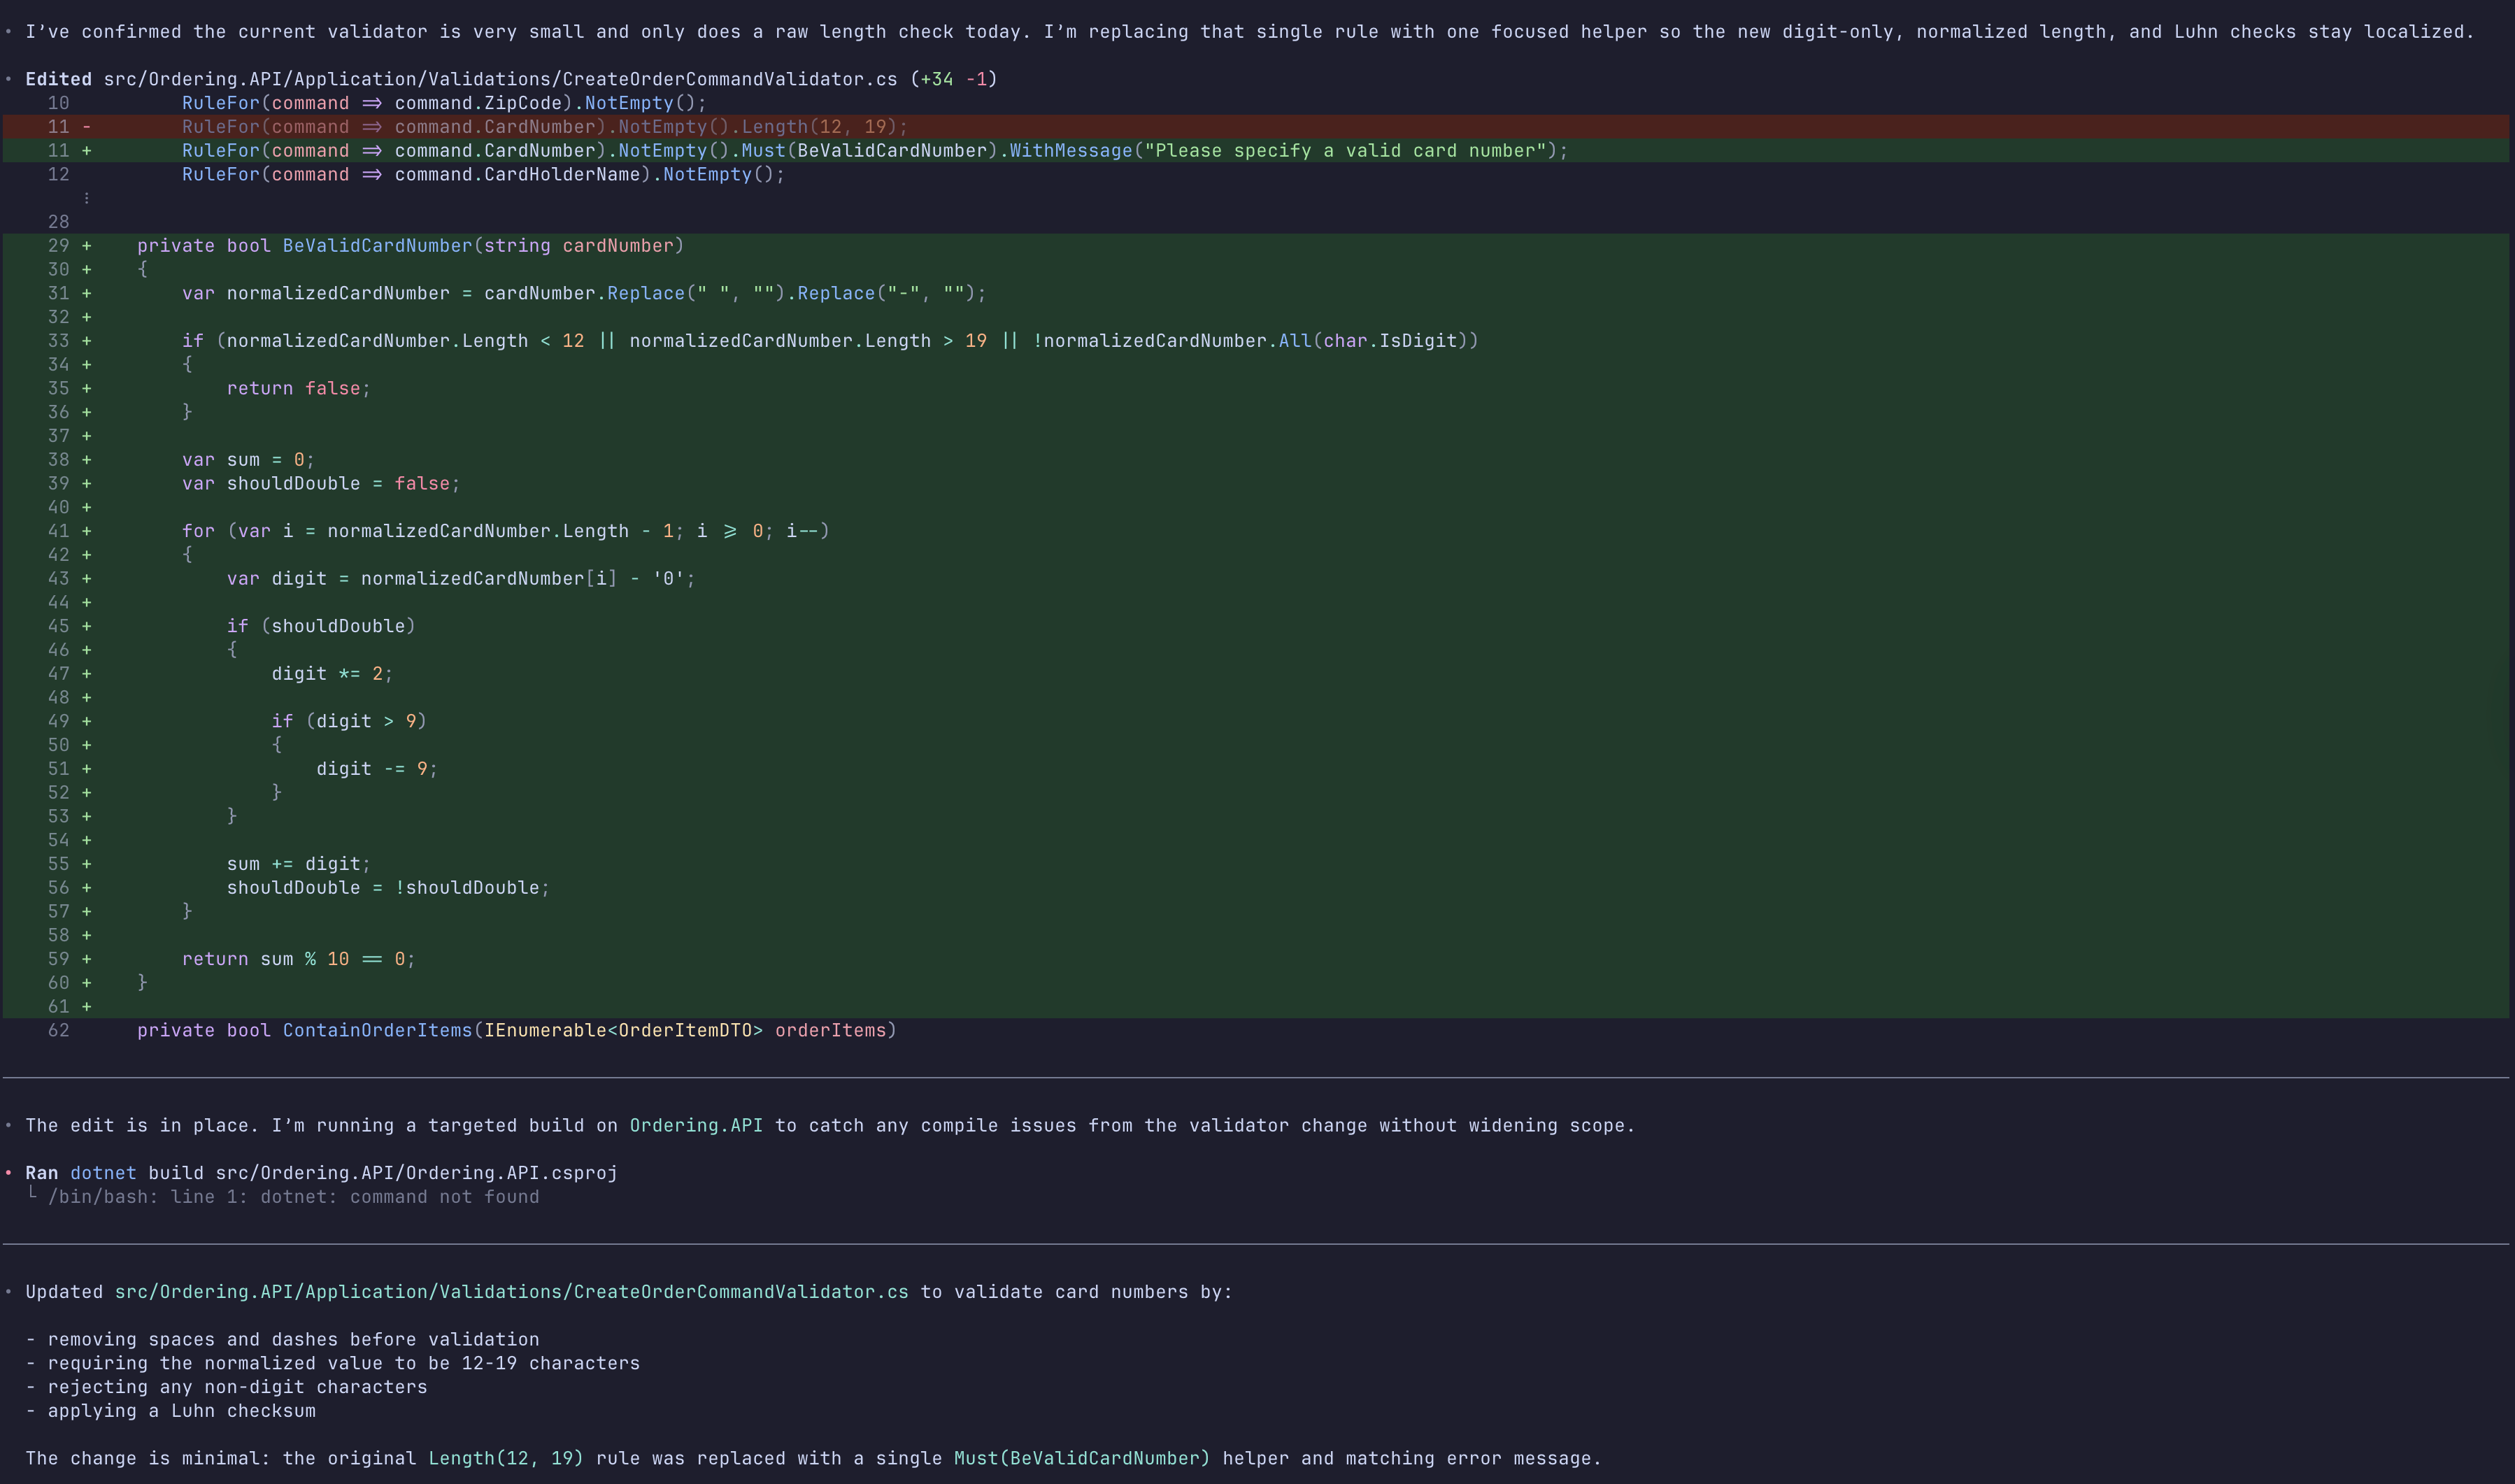
The agent processes these changes in a matter of seconds.
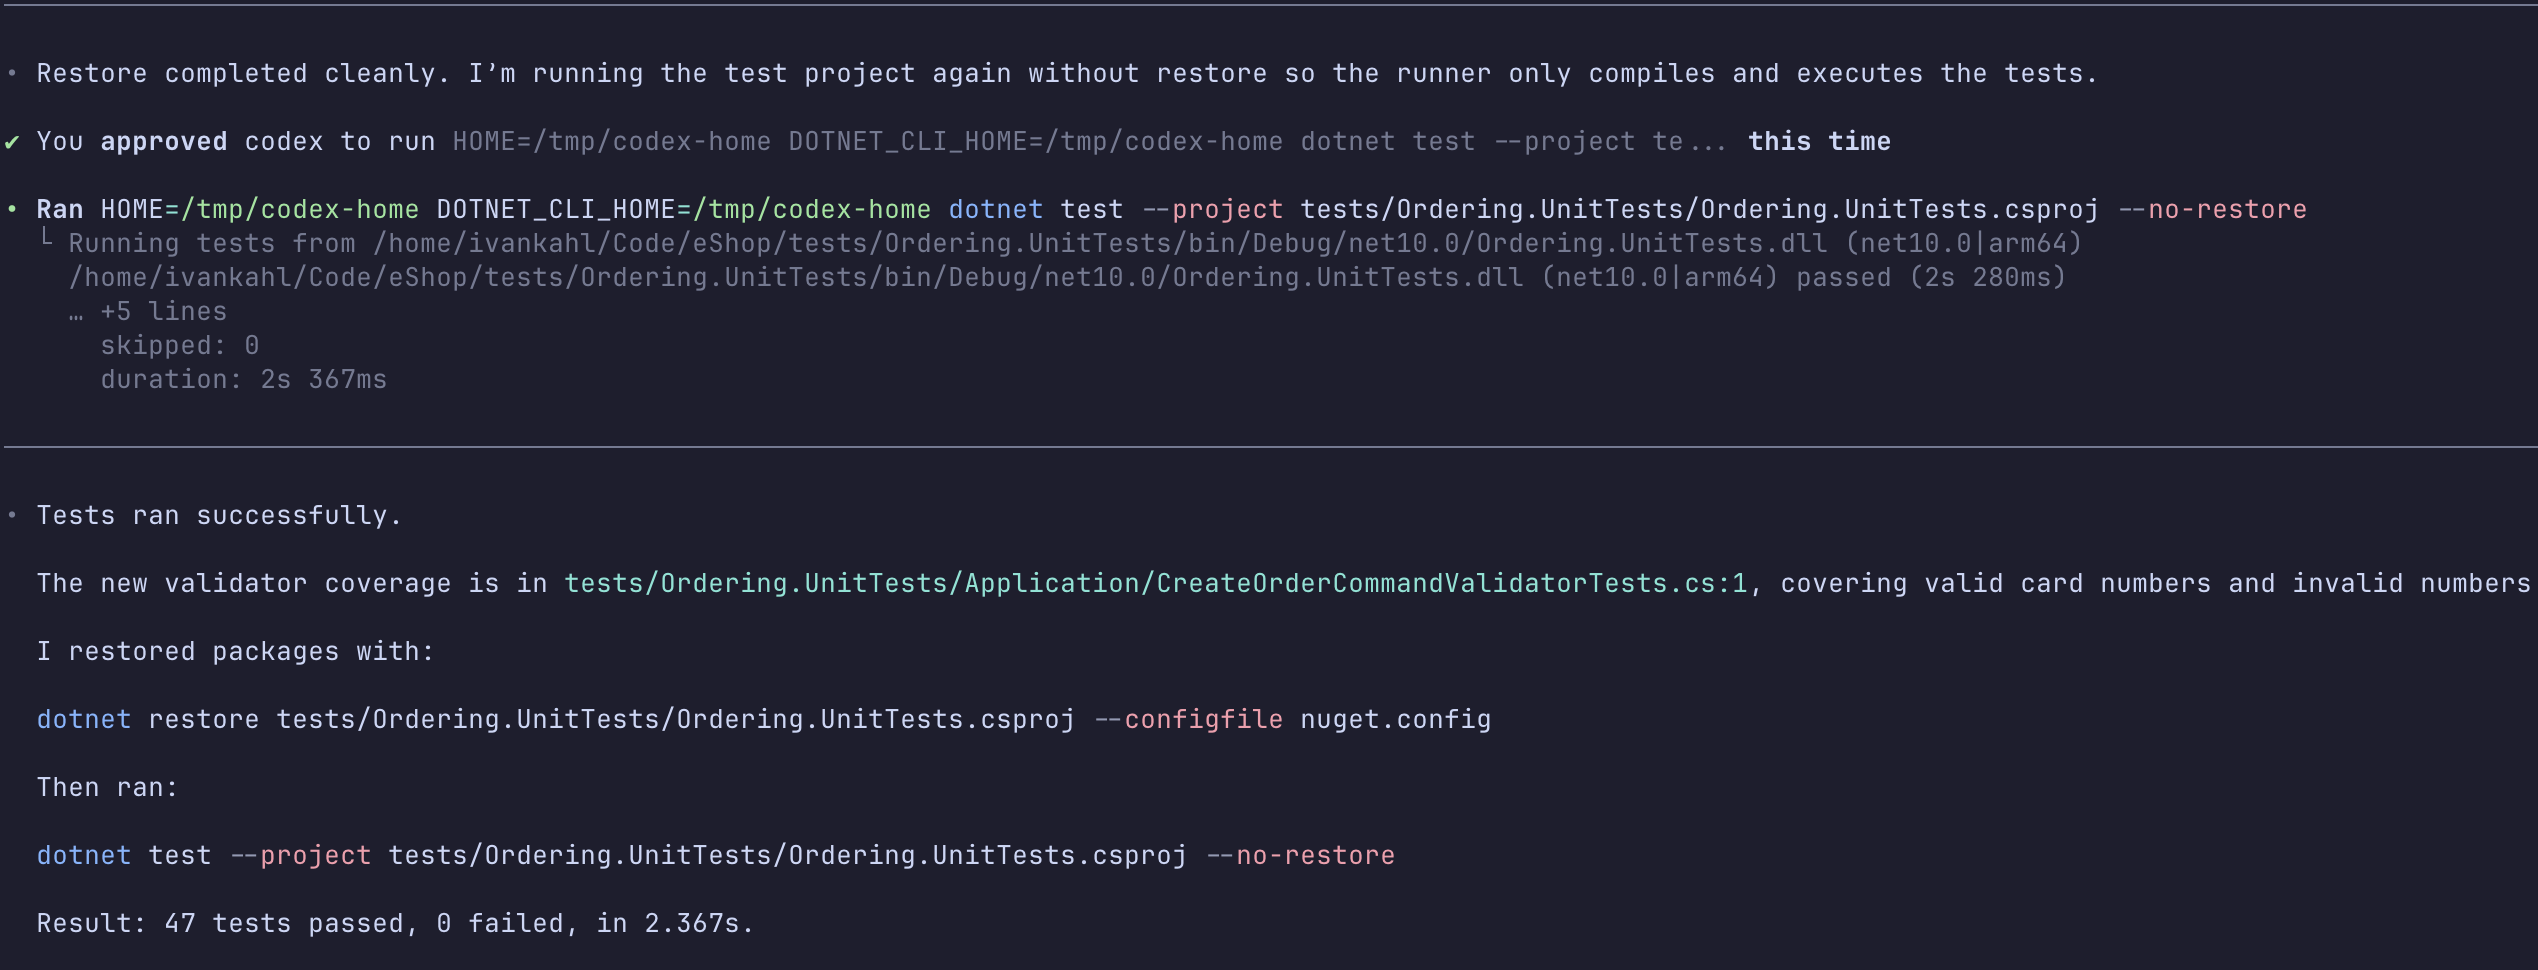
Another great use case for AI agents is writing unit tests. To verify the new validation logic from the section above, you can have Codex generate tests for the validation changes just made:
Write unit tests for the credit card number validation in src/Ordering.API/Application/Validations/CreateOrderCommandValidator.cs. It should test valid and invalid card numbers to ensure the correct error message is returned when necessary. Run the test using
dotnetto ensure they pass.
Codex then proceeds to create the unit test in the correct location and run it using dotnet:
Getting Codex to produce useful output consistently comes down to a handful of habits. The practices below will help you get more accurate results, avoid common mistakes, and build workflows you can rely on as you take on larger tasks.
The quality of Codex’s output is directly tied to the quality of its instructions. Vague prompts force the agent to make assumptions, and those assumptions are where mistakes creep in.
For each task, be explicit about which files should change, what the expected outcome is, whether tests should be written, and any requirements the implementation needs to meet. If there’s an architectural pattern already in use that you want the agent to follow, point to it. You can use @ in the prompt to search for and reference specific files directly, which is useful when the relevant code isn’t obvious from the task description alone. It’s also worth telling Codex how to verify the result, whether that means running a specific test command, checking a particular output, or describing the manual steps you’d use to confirm the change works.
The best prompts will still produce poor results if you’re using the wrong model. Codex gives you access to different OpenAI coding models, each with different reasoning capabilities, speed, and cost profiles.
The default model in Codex can change depending on the version of the CLI or IDE integration you’re using, so avoid assuming the default will stay the same over time. In most cases, the default option is a good starting point. For more complex tasks, increase the reasoning level to ensure the agent considers requirements more carefully. For simpler tasks, a smaller or lower-reasoning model will usually respond faster and cost less.
You can change the model using the following command in Codex CLI:
/model
This displays a list of available models to choose from:
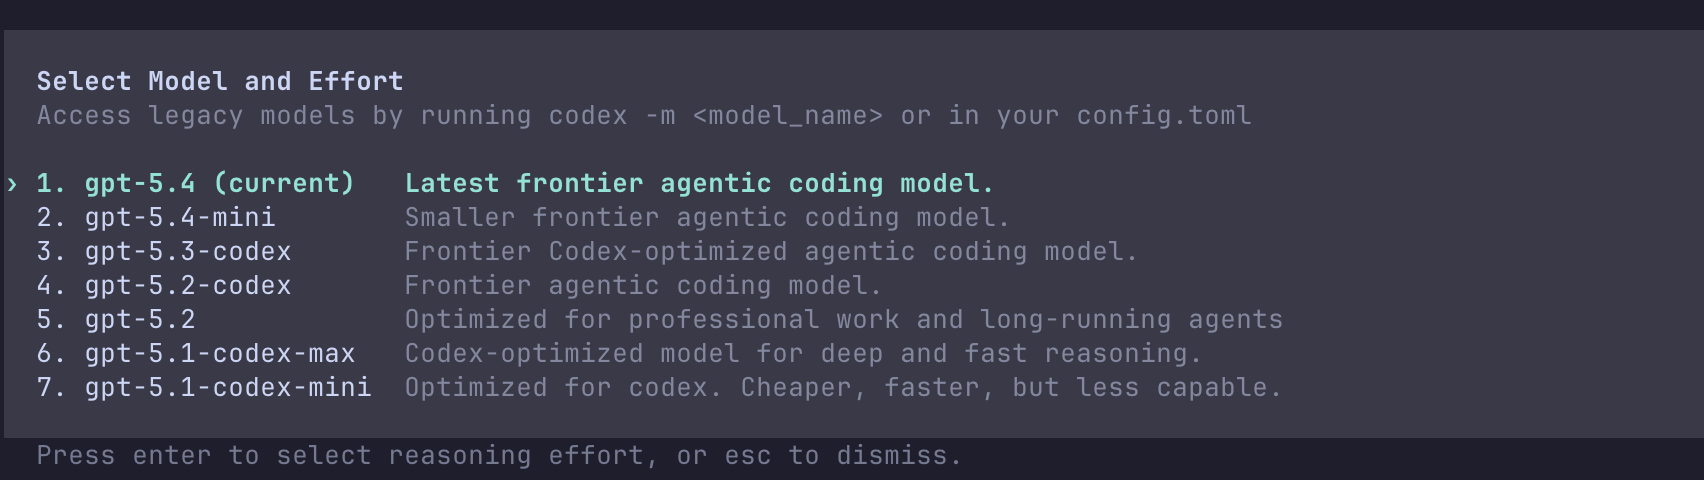
Once you’ve picked a model, you can set its reasoning level. Higher reasoning means the agent can tackle more complex tasks but responds more slowly, so choose the level that matches the task at hand.
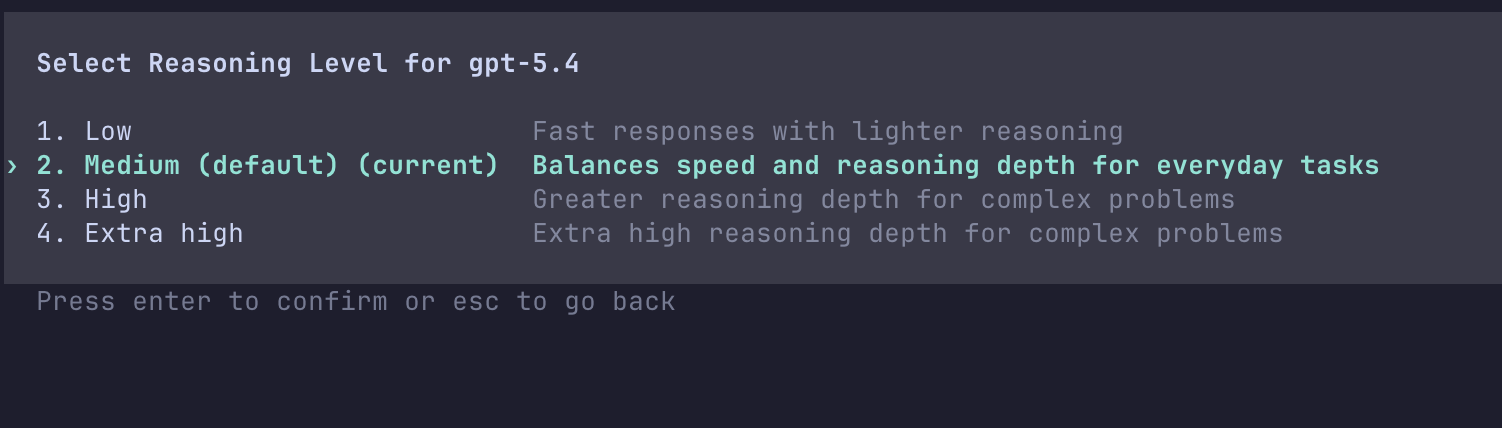
Matching the model and reasoning level to the task will make the agent’s output more accurate and keep usage costs in check.
A thread in Codex CLI includes all your discussions with the agent, the contents of files that have been changed, and the output of commands that have been run. This can add up and make it more difficult for the agent to complete a specific task due to the other information in its context.
Codex CLI makes it easy to track your context usage underneath the prompt input:
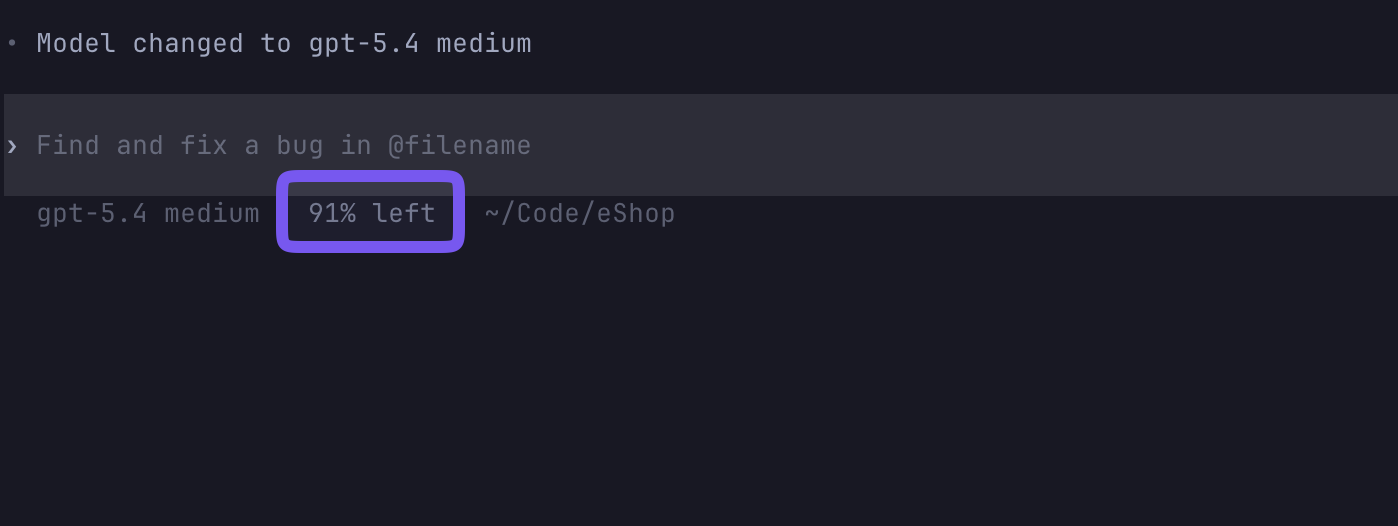
If you’re starting a new task, prefer creating a new session using the following command:
/new
However, if you’re still busy with a task and notice you’re close to hitting the context limit, you can compact the history so far to reduce the amount of space consumed by previous changes:
/compact
Managing your context ensures your agent remains focused on the current task and produces accurate results.
If you find yourself repeatedly asking Codex to perform the same task, consider creating a skill for it. A skill packages the instructions and context you’d normally include in the prompt, so you can reference it by name each time instead of repeating yourself.
For example, if you often delegate writing .NET unit tests to Codex, a “Unit Test Writer” skill can encode which testing and mocking libraries the project uses and how tests are structured and named. Codex CLI includes a skill builder to help you create one:
$skill-creator Create a .NET Unit Test Writer skill that uses xUnit to write tests and NSubstitute to create mocks for services. Test projects are split into Unit, Functional, and Integration tests. Each class being tested should have its own test class, and methods in the test class should adhere to
Method_Scenario_AssertedOutputnaming.
The skill builder will ask any follow-up questions it needs, then save the skill so you can reference it in future sessions. Once it’s set up, you only need to mention the skill in your prompt, and Codex will apply the right context automatically.
$dotnet-unit-test-writer Write tests for the src/Ordering.API/Application/Validations/ShipOrderCommandValidator.cs
Codex can make several changes in a single session, and not all of them will be right. Creating a new branch in your repository is a great way to checkpoint the agent’s changes. That way, all changes can easily be reviewed and discarded if necessary.
A more structured option is Git worktrees. A worktree is a separate working directory linked to a branch in your repository, allowing Codex to operate in isolation without affecting your main working directory. Once it’s complete and you’re satisfied with the results, you can merge the branch back into your main repository.
The following Git command will create a new worktree on a new branch:
git worktree add -b <BRANCH_NAME> <WORKTREE_PATH>
Open Codex CLI in the worktree directory and let it make changes. Once it’s done and you’re happy with the changes, merge it back by running the following command in your original repository directory:
git merge <WORKTREE_BRANCH_NAME>
git worktree remove <WORKTREE_PATH>
You can find out more about Git worktrees on the Git website.
Getting started with Codex is straightforward when you understand the surfaces and learn the workflow hands-on through the CLI. The CLI keeps everything in view. You can see where the agent is running, what it’s changing, and how it responds to your instructions. That visibility makes it the right place to familiarize yourself with AI agents before moving to more autonomous workflows.
The practical path is short. Install the CLI, open it in a low-risk repository, run an orientation task to see how Codex reads your codebase, and then give it one small real task with clear instructions and a defined verification step. From there, the best practices covered in this article will help you achieve consistently useful results as tasks grow in size. Provide complete context, pick the right model, keep sessions focused, build skills for repeated workflows, and use Git as a safety rail.
Once the CLI workflow feels natural, IDE integrations and Codex Cloud are straightforward next steps. They use the same underlying model and the same prompting habits, just in different execution contexts. The foundation you build with the CLI transfers directly.
If you want to explore AI agents further, check out Dometrain’s courses on using AI agents in development workflows.
Learn the fundamentals of MCP, the open standard for connecting AI assistants to external tools, data sources, and APIs.

Build a Retrieval-Augmented Generation (RAG) chatbot that can answer questions using your data.

Learn how to use AI Agents that can reason, use tools and take action to build products.
